


RV Battery Bank Wiring Guide: Safe Setup for 2026
Wiring an RV battery bank correctly means choosing between series, parallel, or series-parallel configurations based on your voltage and capacity goals, then fusing, cabling, and balancing the bank so every battery shares the load equally. Series wiring connects positive to negative sequentially, stacking voltage while capacity stays constant. Parallel wiring joins all positives together and all negatives together, keeping voltage the same while amp-hours add up. Get either one wrong and you risk uneven battery wear, voltage drop, or a fire hazard from undersized cables.
Key principles before you touch a single terminal:
- Series: positive to negative between batteries; voltage doubles, capacity unchanged
- Parallel: positive to positive, negative to negative; capacity doubles, voltage unchanged
- Series-parallel: combines both to hit a target voltage and capacity simultaneously
- Fuse placement: ANL fuse within 300mm of the positive terminal on every positive cable
- Balanced wiring: main positive feed from one corner of the bank, main negative from the diagonally opposite corner
- Lithium BMS limits: always verify your specific model’s maximum series and parallel connections before wiring
Bansheebatteries has spent over 20 years engineering AGM and LiFePO4 batteries for demanding off-grid applications, and the guidance throughout this article reflects that depth of field experience.
How to wire your RV battery bank step by step
Tools and materials checklist
Before cutting a single cable, gather everything you need:
- 100% copper marine-grade cable (2 AWG for up to 200A loads; 0 AWG for 300A+)
- ANL or Mega fuse holders and correctly rated fuses
- Copper terminal lugs (solder or crimp style)
- Heavy-duty battery disconnect switch
- Digital multimeter (such as a Fluke 117)
- Torque wrench (0–50 inch-pounds)
- Wire stripper, crimper, heat gun
- Dielectric grease, safety glasses, and work gloves
Wiring steps
Step 1: Plan your configuration. Decide whether you need more run time at 12V (parallel), a higher system voltage like 24V or 48V (series), or both (series-parallel). Your inverter’s voltage requirement drives this decision.
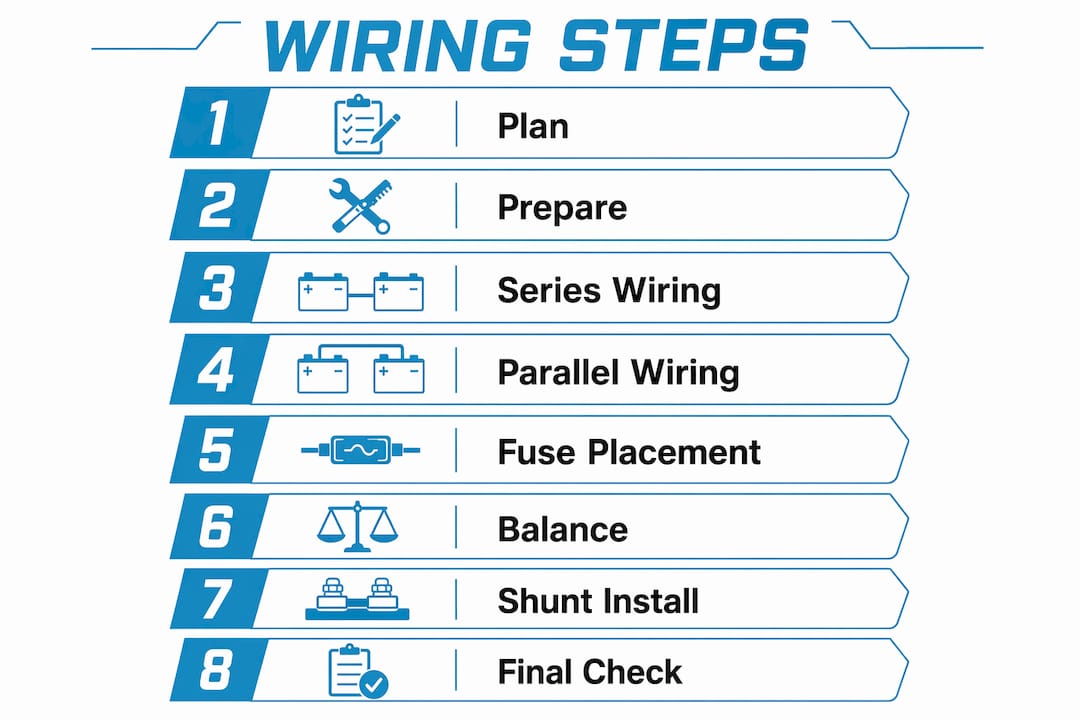
Step 2: Prepare terminals and cables. Clean all terminals with a wire brush. Corrosion increases resistance and reduces charging speed noticeably. Apply dielectric grease after cleaning. Cut cables to exact, uniform lengths.
Step 3: Wire series connections (if voltage stacking). Connect the positive terminal of Battery 1 to the negative terminal of Battery 2. Continue the chain. The only free terminals are the first battery’s negative and the last battery’s positive. Measure voltage across those free terminals with your multimeter: two 12V batteries in series should read 24V. Tighten all lugs to 50 inch-pounds.
Step 4: Wire parallel connections (if capacity stacking). Connect all positive terminals to a single positive bus bar and all negative terminals to a single negative bus bar using equal-length heavy cable. Each battery in a parallel bank must have its own individual fuse on its cable to the bus bar. Without individual fuses, a short in one battery discharges through the others and causes internal damage.
Step 5: Size and place fuses correctly. Fuse ratings should be 125–150% of the maximum expected discharge current. For example, a 200A system should use a 250A fuse, and a 300A system should use a 400A fuse, following inverter specs. The fuse must sit within 300mm of the positive terminal.
Step 6: Balance the bank. Take the main positive feed from one end of the bank and the main negative from the diagonally opposite corner. This ensures every battery sees the same current path length and shares the work equally.
Step 7: Install the battery monitor shunt. The shunt must sit in the main negative cable as the sole path between battery negative and the rest of the system. Any bypass renders your state-of-charge readings inaccurate.
Step 8: Final check. Verify voltage across bus bars, inspect every connection for tightness, and insert the main ANL fuse last.
Pro Tip: Cut all interconnecting cables to identical lengths before crimping the lugs. Even a few inches of difference creates resistance imbalance across the bank, causing some batteries to work harder than others and fail earlier.
| Configuration | Voltage result | Capacity result | Best use case |
|---|---|---|---|
| Parallel | Same as single battery | Multiplied by battery count | More run time at 12V |
| Series | Multiplied by battery count | Same as single battery | 24V or 48V systems |
| Series-parallel | Adds within series strings | Adds across parallel strings | High voltage and high capacity |
Common mistakes that wreck RV battery banks
1. Mixing battery ages and models
Batteries in a bank must match by brand, type, capacity, and manufacturing date. Internal resistance varies even between identical models from different production batches. One weaker battery drags the entire bank, accelerating failure across all cells.
2. Skipping individual fuses on parallel strings
Every cable from a parallel battery to the bus bar needs its own fuse. Without it, a short in one battery pulls current from all the others simultaneously.
3. Undersized cabling
Too-small cable causes voltage drop and fire risk. Use 2 AWG minimum for 200A systems and 0 AWG for 300A or higher. Keep voltage drop under 3% across the DC system.
4. Bypassing the battery monitor shunt
Any load or charge source wired directly to the battery negative without passing through the shunt gives false state-of-charge readings. The shunt must be the only connection point between battery negative and everything else.
5. Unequal cable lengths
Uniform cable lengths prevent resistance imbalance and uneven current distribution. Cables of different lengths mean some batteries discharge faster than others.
6. Ignoring lithium BMS limits
Some LiFePO4 BMS designs do not allow series connections at all. Exceeding the manufacturer’s stated series or parallel limits can damage both the batteries and the BMS. Always read the manual for your specific model before wiring.
7. Overbuilding without real usage data
Building a massive bank based on theoretical maximums adds weight and cost without matching actual needs. Log your real daily usage first, then size accordingly.
Choosing the right battery with guidance from Bansheebatteries
Battery selection determines how long your wiring job actually performs. A perfectly wired bank built on mismatched batteries will still fail prematurely.
Match chemistry first. Never mix AGM and LiFePO4 in the same bank. They charge at different voltages and discharge at different rates. Mixing them forces one chemistry to operate outside its ideal range constantly. For a detailed comparison of how these two chemistries perform in real conditions, the lithium vs AGM breakdown from Bansheebatteries covers the tradeoffs clearly.
Match manufacturing dates. Even identical model batteries from different production runs carry slightly different internal resistance values due to shelf aging. Buy batteries from the same batch when building a new bank.
Verify C-rates against your inverter. A 2,000W inverter pulls roughly 200A from a 12V bank at full load. If your battery’s BMS is rated for only 100A discharge, it will trip protection before the inverter reaches its limit. LiFePO4 batteries generally handle high current better than AGM, but the BMS rating is the hard ceiling.
Bansheebatteries backs its AGM batteries with a 4-year warranty and its lithium marine batteries with a 5-year warranty. That kind of coverage reflects genuine confidence in the build quality and gives RV owners a real safety net when the system is working hard miles from the nearest service center.
Battery selection checklist:
- Same chemistry (AGM or LiFePO4) across all batteries in the bank
- Same brand, model, and capacity (amp-hours)
- Same manufacturing date or batch
- BMS discharge rating exceeds inverter peak draw
- Series and parallel limits confirmed in the manufacturer manual
For a versatile lithium option that works across RV, marine, and solar applications, the Banshee 36V 100Ah lithium battery demonstrates the kind of multi-application engineering Bansheebatteries builds into its lineup.
How to size your RV battery bank based on actual power use
Guessing your battery bank size from a forum post is how you end up hauling 400 extra pounds down the highway. Size the bank from your daily watt-hours, your autonomy goal, and your actual charging conditions.
Step 1: Log real appliance usage for at least a week. Track every load: compressor fridge, vent fans, water pump, lights, router, laptop, CPAP, inverter standby draw. Multiply each appliance’s wattage by its daily hours to get watt-hours per day.
Step 2: Apply the sizing formula.
Required Ah = (Daily Wh × Days of autonomy) ÷ (System voltage × Depth of discharge)
For a 12V LiFePO4 system using 900Wh per day with 2 days of autonomy and 80% depth of discharge: (900 × 2) ÷ (12 × 0.8) = 188Ah. Round up to 200Ah.
Step 3: Account for chemistry differences. LiFePO4 batteries deliver roughly 80–100% of rated capacity as usable energy. AGM batteries should be planned at 50% depth of discharge to protect longevity. A 200Ah AGM bank effectively gives you about 100Ah of usable energy, meaning you need twice the rated capacity to match a lithium bank of the same size.
Step 4: Factor in autonomy and charging reality. Most RV systems target 2 days of autonomy as a baseline. A large bank paired with weak charging drifts into chronic deficit. Size your solar, alternator, or shore charging alongside the bank, not as an afterthought. For a full walkthrough of the sizing math, the RV battery bank sizing guide from Bansheebatteries covers every variable in detail.
Pro Tip: Before finalizing bank size, check your inverter’s surge rating against your battery’s peak discharge current. A microwave or air conditioner startup draws 2–3x its running wattage for a few seconds. If the bank can’t supply that surge without tripping the BMS, the system will frustrate you daily.
Best practices for RV battery bank wiring in 2026
A well-wired bank comes down to a short list of non-negotiable steps:
- Choose the right configuration: parallel for more 12V run time, series for 24V or 48V systems, series-parallel for both
- Fuse every positive cable within 300mm of the battery terminal, sized at 125–150% of maximum discharge current
- Use properly sized cable: 2 AWG minimum for 200A loads, 0 AWG for 300A or higher
- Balance the bank diagonally: positive feed from one corner, negative from the opposite corner
- Cut all cables to identical lengths to prevent resistance imbalance and uneven battery wear
- Verify lithium BMS limits for your specific model before connecting any series or parallel strings
- Use matched batteries by chemistry, model, capacity, and manufacturing date
- Install a shunt-based battery monitor as the sole path in the negative cable
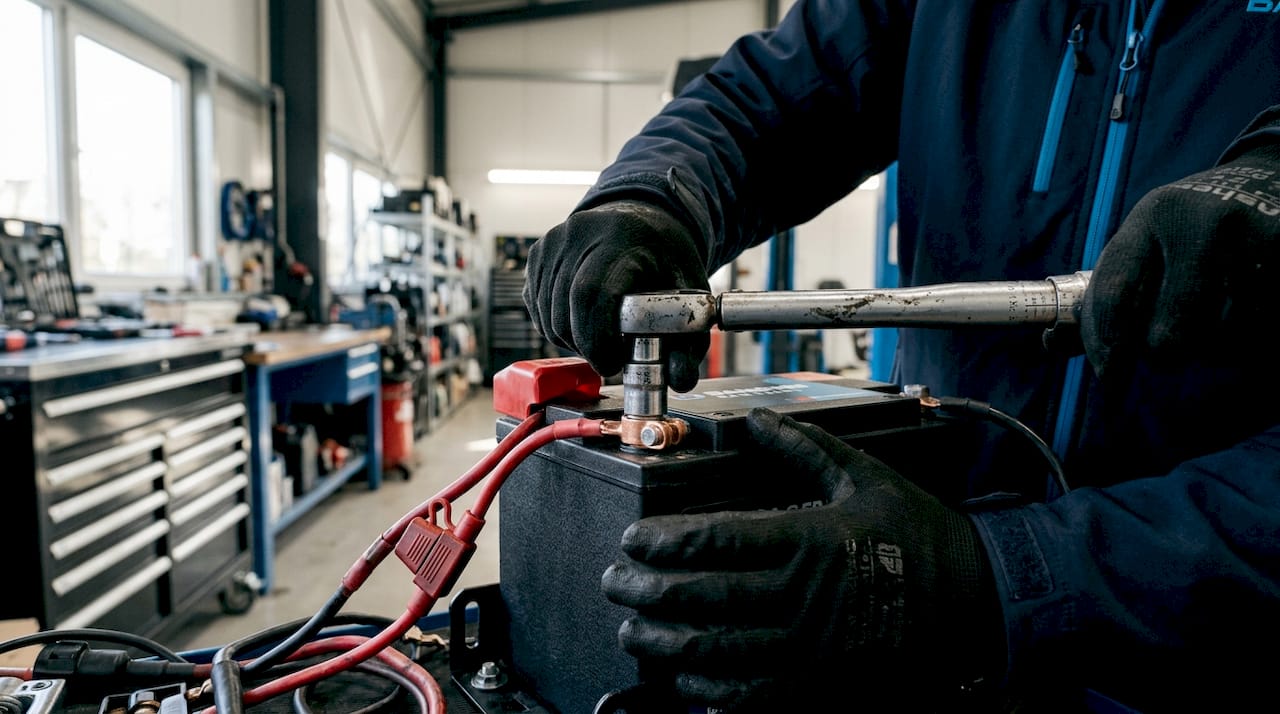
- Torque all terminals to spec (50 inch-pounds) and apply dielectric grease to prevent corrosion
- Inspect connections every few months for looseness, corrosion, or heat damage
Bansheebatteries builds AGM and LiFePO4 batteries specifically for the kind of demanding, off-grid use that RV electrical systems see. Their LiFePO4 marine battery lineup is engineered for high-cycle durability with BMS protection designed to handle the current demands of real inverter loads.
Key Takeaways
Wiring an RV battery bank correctly requires matching your configuration to your voltage goal, fusing every positive cable within 300mm of the terminal, and balancing the bank diagonally for equal current distribution.
| Point | Details |
|---|---|
| Series vs. parallel | Series adds voltage; parallel adds capacity. Choose based on your system voltage target. |
| Fuse placement | ANL fuse must sit within 300mm of the positive terminal to prevent fire from a short circuit. |
| Cable sizing | Use 2 AWG for 200A loads and 0 AWG for 300A or higher; keep voltage drop under 3%. |
| Bank balancing | Take the main positive from one corner and the main negative from the diagonally opposite corner. |
| Battery matching | Use the same chemistry, model, capacity, and manufacturing batch across all batteries in the bank. |