


How to Recondition a Deep Cycle Battery: A Safe DIY Guide
Many deep-cycle lead-acid batteries can be reconditioned, but only when they pass a few basic checks first. If your battery reads above 10.5V at rest, shows no physical damage, and hasn’t been sitting dead for more than six months, there’s a real chance you can bring it back. If it reads 0V, smells like rotten eggs, or the case is swollen, stop now and recycle it.
Quick pass/fail criteria:
- Resting voltage above 10.5V: Below this, recovery is unlikely but still possible with desulfation. At 0V, the battery almost certainly has an internal short or broken connection and cannot be saved.
- No physical damage: Swelling, cracks, leaks, or heavy corrosion on the case are hard stop signs.
- Not dormant longer than six months: Batteries left dead for six or more months have significantly lower revival success rates and shorter post-revival service life.
- Cell balance within range: If specific gravity varies more than 0.050 across cells, internal damage may be too advanced.
A typical home reconditioning attempt costs a moderate amount in consumables (distilled water, Epsom salt if applicable, baking soda) assuming you already own or borrow a smart charger. Plan for 24–72 hours of charging time across one to three cycles.
Realistic outcome: a battery that works again for 6–18 months with proper follow-up maintenance, not a battery restored to factory spec.
Table of Contents
- How do you know if a deep cycle battery can be reconditioned?
- Essential safety steps before you work on a lead-acid battery
- What tools and materials do you actually need?
- Which reconditioning method actually works?
- Step-by-step reconditioning protocols you can follow at home
- When should you stop reconditioning and replace the battery?
- Routine maintenance that prevents sulfation from coming back
- Why professionals prefer pulse/desulfation over chemical fixes
- Key Takeaways
- The case for knowing when to quit
- When reconditioning fails: replacement options from Bansheebatteries
- Useful sources and recycling resources
How do you know if a deep cycle battery can be reconditioned?
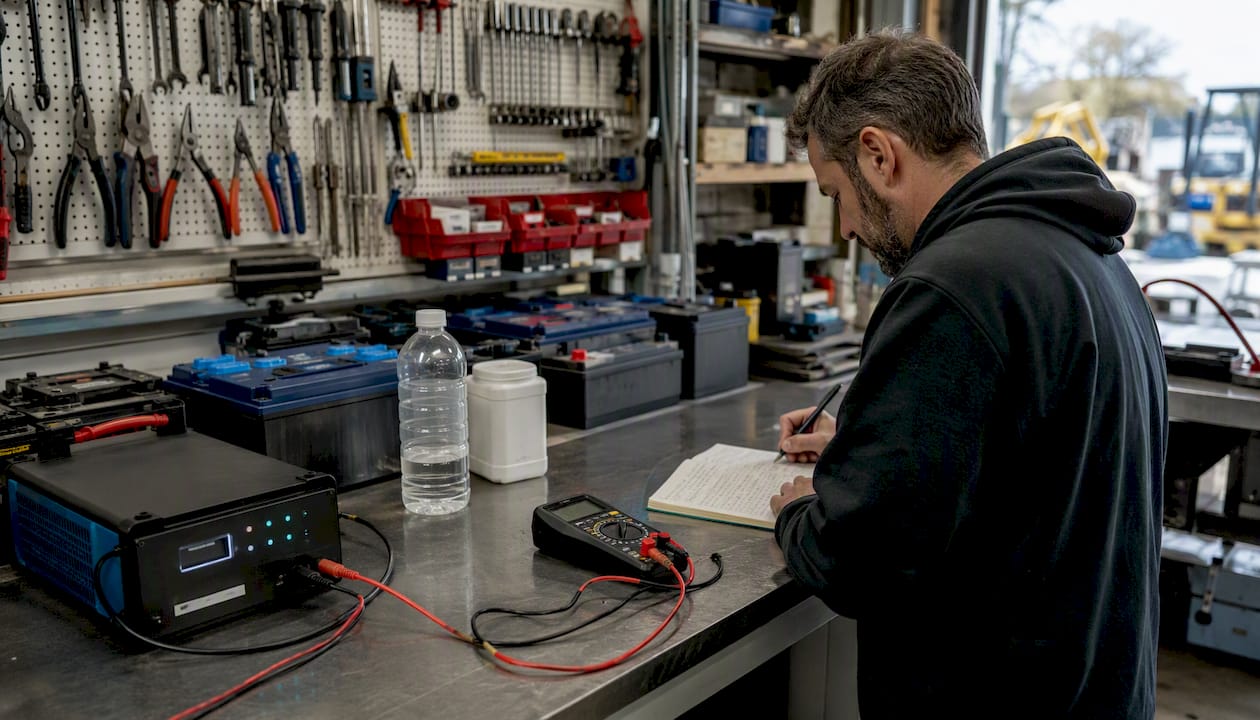
Testing before you touch anything else saves time and prevents wasted effort. Three tests tell you most of what you need to know: a resting voltage check, a specific gravity reading (flooded cells only), and a load test.
Resting voltage
Let the battery rest for at least two hours after any charge or discharge before measuring. Connect a digital multimeter set to DC voltage across the terminals, positive to positive.
| Resting Voltage | What It Means |
|---|---|
| Approximately 12.7V | Fully charged, healthy |
| Around 12.5V | Slightly discharged, likely fine |
| Around 12.1V | Moderately discharged, needs attention |
| 10.5–11.8V | Deeply discharged or sulfated, reconditioning possible |
| Below 10.5V | Severe sulfation or internal fault, low recovery odds |
| 0V | Internal short or open cell, recycle immediately |
Specific gravity (flooded lead-acid only)
A hydrometer measures the density of the electrolyte in each cell. A fully charged flooded cell reads around 1.265–1.280. Readings below 1.225 often indicate sulfation, and unequal readings across cells point to imbalance or internal damage. Draw a sample from each cell and record every reading. A variation of more than 0.050 between the highest and lowest cell is a warning sign; more than 0.100 usually means one or more cells are failing internally.
Load test procedure
A battery load tester applies a controlled current draw and measures how voltage holds up under stress. For a practical home test, connect a load equal to roughly half the battery’s cold-cranking amp rating (or use a dedicated load tester). Watch the voltage for 15 seconds.
If voltage drops below 10.5V under a reasonable load, the battery has reduced usable capacity. That doesn’t automatically mean it’s dead, but it does mean reconditioning alone may not restore full performance.
Visual inspection checklist
Before any electrical test, look the battery over carefully:
- Swollen or bulging case: Indicates internal gas buildup or thermal damage. Recycle.
- Cracked or leaking case: Acid exposure risk. Do not attempt reconditioning.
- Heavy terminal corrosion: Cleanable with baking soda and water, not a disqualifier on its own.
- Rotten-egg odor: Hydrogen sulfide gas from overcharging or internal decomposition. Ventilate immediately and assess carefully.
- White or blue crust around terminals: Normal sulfate buildup, clean it off before testing.
Essential safety steps before you work on a lead-acid battery
Lead-acid batteries contain sulfuric acid and produce hydrogen gas during charging. Neither is forgiving if you skip the basics.
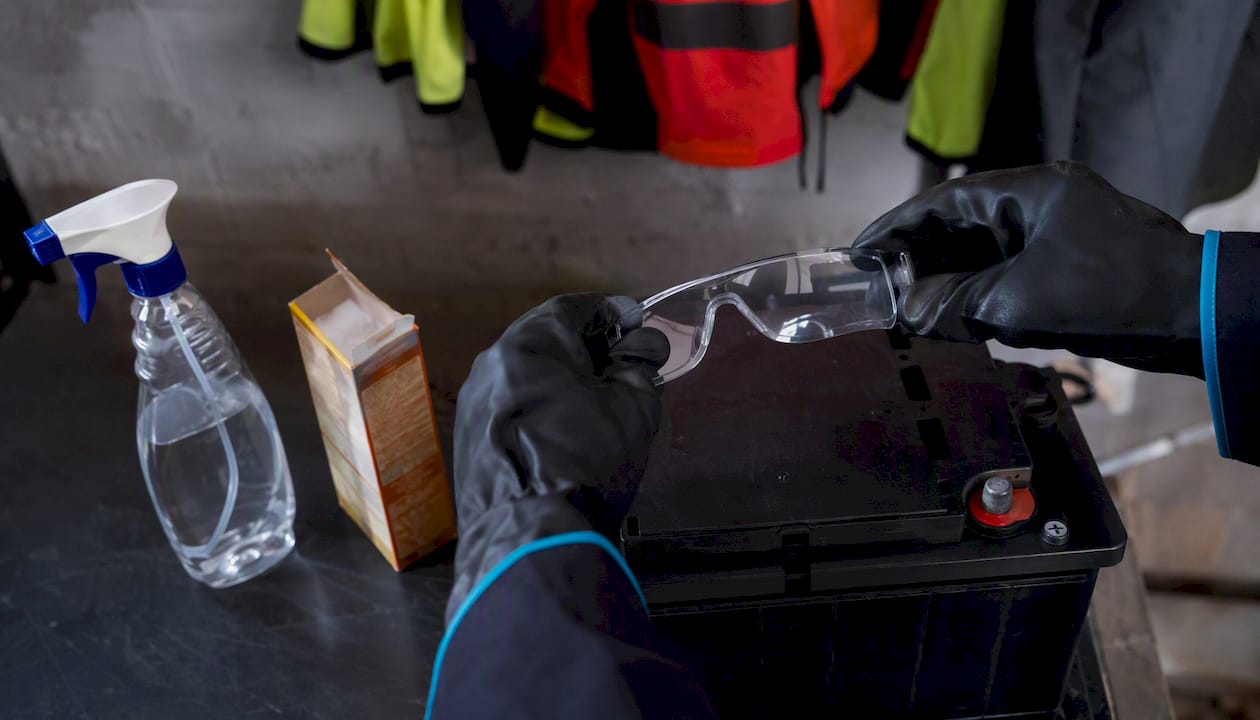
Minimum PPE: Acid-resistant gloves (nitrile or rubber, not thin latex), safety glasses or a face shield, and an old long-sleeve shirt or apron. Sulfuric acid burns skin and destroys fabric on contact.
Workspace: Work outdoors or in a garage with the door open. Never work near open flames, pilot lights, or sparks. Hydrogen gas is lighter than air and accumulates near the ceiling, so ventilation matters even when you can’t smell anything.
Disconnecting the battery: Always disconnect the negative terminal first, then the positive. Reconnect in reverse order (positive first, then negative). This sequence prevents accidental short circuits through the vehicle chassis.
Acid spill response: If electrolyte contacts skin, flush with large amounts of water for at least 15 minutes and seek medical attention. Neutralize spills on surfaces with a baking soda and water solution (about one tablespoon per cup of water). For large spills or eye contact, call 911 or Poison Control at 1-800-222-1222.
Pro Tip: Keep a small box of baking soda and a spray bottle of water within arm’s reach whenever you’re working with flooded cells. A fast neutralization response is the difference between a minor incident and a serious one.
Disposal: Irreparably damaged lead-acid batteries must go to a certified recycling center. Most auto parts retailers (AutoZone, O’Reilly, Advance Auto Parts) accept used lead-acid batteries at no charge. Municipal hazardous waste programs are another option. Never put a lead-acid battery in household trash or a dumpster.
What tools and materials do you actually need?
You don’t need a professional shop to recondition a deep-cycle battery at home, but a few specific items make the difference between a safe, effective process and a frustrating one.
Essential tools:
- Digital multimeter with at least 0.1V resolution (a $15–$25 unit from Harbor Freight or Amazon works fine)
- Hydrometer for flooded lead-acid cells (bulb-style or float-style, around $10–$15)
- Battery load tester (carbon pile or electronic; borrow one from an auto parts store if you don’t own one)
- Smart charger with a repair or desulfation mode (this is the single most important purchase if you don’t already own one)
- Pulse desulfator (optional standalone unit; useful if your charger lacks a repair mode)
- Insulated wrenches or battery terminal tools
- Terminal cleaning brush (wire brush designed for battery posts)
- Acid-safe plastic containers if you’re draining and refilling flooded cells
Consumables:
- Distilled water (not tap water, which contains minerals that contaminate cells)
- Epsom salt (magnesium sulfate): For flooded lead-acid batteries only. Never use in AGM or gel batteries. Incorrect dosing can permanently damage plates.
- Baking soda for terminal cleaning and spill neutralization
- PPE supplies as listed in the safety section
Charger selection matters. A basic trickle charger won’t cut it for reconditioning. You need a smart charger that can detect battery condition and apply a repair or desulfation cycle. For batteries in a common capacity range for marine, RV, or golf cart use, look for a charger rated at a moderate amperage or higher. Bansheebatteries carries a fully automatic 10A smart charger compatible with all lead-acid types, including flooded and AGM, up to 230Ah.
AGM and gel compatibility note: Epsom salt and electrolyte drain procedures apply only to flooded (wet cell) batteries. AGM and gel batteries are sealed. Attempting to open them or add chemicals will destroy them. For AGM battery maintenance after reconditioning, stick to smart charger desulfation only.
Which reconditioning method actually works?
Four methods are worth knowing. They’re not equally effective, and two of them carry real risks if applied to the wrong battery type.
| Method | Battery Types | Time Required | Main Risk | Expected Recovery |
|---|---|---|---|---|
| Smart charger pulse/desulfation | Flooded, AGM, gel | 24–72 hours | Overheating if charger lacks cutoff | Best overall; safest repeatable method |
| Equalization charging | Flooded only | 2–8 hours | Overcharging, gassing, plate damage | Good for mild sulfation and cell imbalance |
| Epsom-salt electrolyte refresh | Flooded only | 12–48 hours (including charge) | Plate damage from incorrect dosing | Moderate; higher risk, requires precision |
| Controlled cycling | All types | Multiple days | None beyond time investment | Useful for capacity verification, not revival |
Pulse/desulfation is the method professionals reach for first. Smart chargers with repair or desulfation modes use high-frequency pulse charging to break down lead-sulfate crystals and are the safest, most repeatable DIY approach. They work on flooded, AGM, and gel batteries without opening the case.
Equalization charging applies a controlled overcharge to a flooded battery to bring all cells to the same state of charge. It’s useful when hydrometer readings show cell imbalance, but it produces significant gassing and must be done with the caps off and in a ventilated space.
Epsom-salt refresh gets a lot of attention online. It applies only to flooded lead-acid batteries and carries real risks if mixed or applied incorrectly. Chemical additives can permanently damage plates with incorrect dosing. Professionals generally favor pulse/desulfation technology over chemical fixes for exactly this reason.
Controlled cycling (repeated charge/discharge at C/20 rate) doesn’t revive a battery on its own, but it’s the right way to verify whether a battery has recovered usable capacity after desulfation or equalization.
Avoid household chemical hacks (baking soda in the electrolyte, aspirin tablets, Coca-Cola). These are internet myths. Extreme overcharging to “burn off” sulfation without a proper charger is equally dangerous and will warp plates.
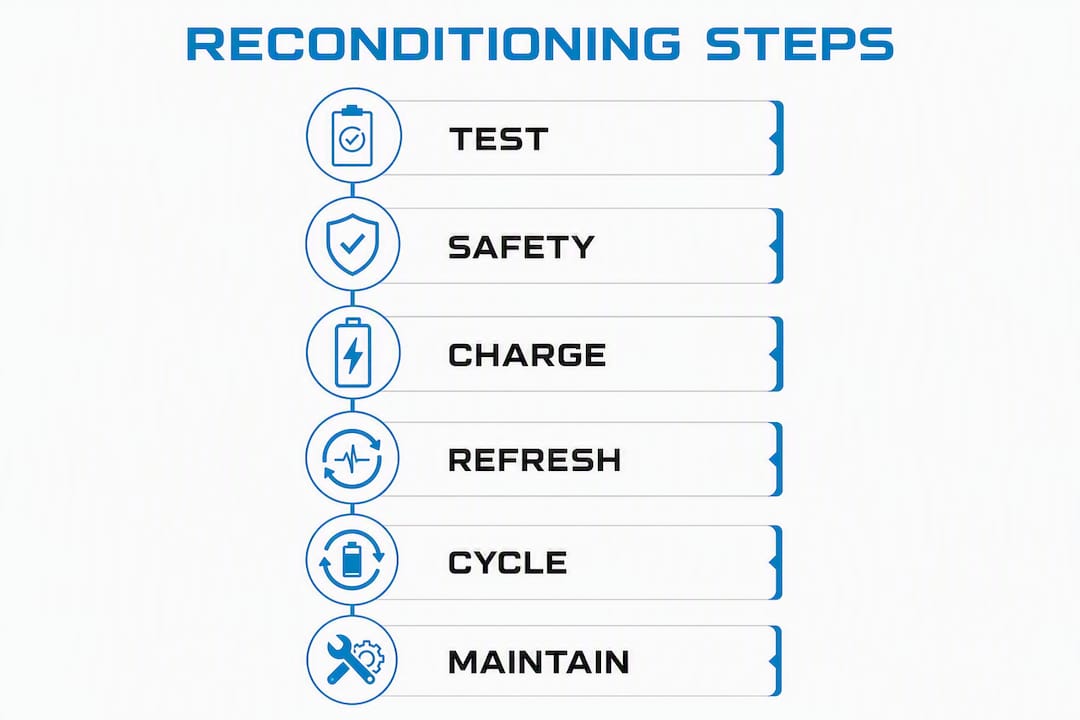
Step-by-step reconditioning protocols you can follow at home
Protocol A: Smart charger pulse/desulfation
This is the right starting point for almost every battery, regardless of type.
- Clean terminals with a baking soda solution and a wire brush. Rinse with water and dry completely.
- Check resting voltage with your multimeter. If it reads 0V, stop here and recycle the battery.
- Connect the charger positive to positive, negative to negative.
- Select the repair, recondition, or desulfation mode on your smart charger.
- Let the charger run. Professional desulfation cycles typically alternate between pulse voltages around a higher voltage and absorption phases around a lower controlled voltage, running about one to two days or longer depending on battery condition.
- Check voltage every 12 hours. A battery responding to treatment will show a gradual voltage increase.
- After the cycle completes, let the battery rest for two hours, then run a load test.
Stop criteria: If the battery overheats (too hot to touch comfortably), if voltage hasn’t increased after 48 hours, or if the charger repeatedly faults out, discontinue and assess for internal damage.
Protocol B: Equalization charging (flooded lead-acid only)
- Confirm the battery is flooded (removable cell caps). Never equalize a sealed AGM or gel battery.
- Remove cell caps and check electrolyte levels. Top off with distilled water if needed, but don’t overfill.
- Set your smart charger to equalization mode, or manually set it to 15.5–16.0V at a low current (C/20 rate).
- Monitor every 30 minutes. Measure specific gravity in each cell with the hydrometer.
- Continue until specific gravity stops rising and all cells read within 0.010 of each other, typically 2–8 hours.
- Replace caps, rinse any electrolyte residue off the case with baking soda solution, and run a load test.
Stop criteria: Stop immediately if any cell temperature exceeds 110°F, if you see heavy bubbling beyond normal gassing, or if one cell refuses to come up in specific gravity.
Protocol C: Epsom-salt electrolyte refresh (flooded lead-acid only)
Use this only if desulfation charging has failed and the battery is flooded. This method requires precision.
- Fully charge the battery first, then discharge it to about 50% capacity.
- Remove cell caps. Using a turkey baster or battery filler, carefully draw out the existing electrolyte from each cell into an acid-safe container. Label it for proper disposal.
- Mix a solution of distilled water and Epsom salt: approximately 7–8 oz of magnesium sulfate per quart of distilled water, heated to around 150°F to dissolve completely. Let it cool before adding to cells.
- Fill each cell to the correct level (just above the plates, not to the top).
- Replace caps loosely to allow gassing.
- Charge slowly at C/20 rate for 12–24 hours.
- Check specific gravity after charging. If readings are uniform and above 1.225, run a load test.
Pro Tip: The old electrolyte you removed is hazardous waste. Seal it in a labeled plastic container and take it to your local auto parts store or hazardous waste facility. Never pour it down a drain or into soil.
Stop criteria: If specific gravity remains below 1.200 after a full charge cycle, or if cells show more than 0.050 variance, the plates are likely too damaged to recover.
Protocol D: Controlled cycling and capacity verification
- After any reconditioning attempt, fully charge the battery.
- Discharge at C/20 rate (for a 100Ah battery, that’s a 5A load) and record how long it takes to reach 10.5V.
- A healthy 100Ah battery should deliver close to 100Ah at C/20. If you’re getting less than about two-thirds to three-quarters of rated capacity, the battery has significant permanent loss.
- Recharge fully and repeat the cycle two to three times. Some batteries recover additional capacity across multiple cycles.
- If capacity doesn’t improve after three cycles, the battery has reached its practical limit.
When should you stop reconditioning and replace the battery?
Some batteries are beyond help, and continuing to work on them wastes time and risks safety. Knowing when to stop is as important as knowing how to start.
| Failure Sign | What It Means | Action |
|---|---|---|
| 0V resting voltage | Internal short or open cell | Recycle immediately |
| Swollen or bulging case | Thermal damage, internal gas | Recycle immediately |
| Cracked or leaking case | Structural failure, acid exposure | Recycle immediately |
| Persistent 0V after 48-hour desulfation | Broken internal connection | Recycle |
| Cell capacity variance above 30% | Plate damage beyond reconditioning | Recycle |
| Specific gravity below 1.150 after full charge | Severe sulfation or plate shedding | Replace |
| Voltage drops below 10.5V under light load after 3 cycles | Permanent capacity loss | Replace |
Older batteries or those dormant for six or more months have lower revival success rates and shorter post-revival service life. Even a successful revival has a ceiling: deep-cycle marine batteries typically last 12–18 months after revival, depending on maintenance and how quickly you intervened after failure.
Cost comparison: A basic reconditioning attempt with consumables costs modestly if you already own a smart charger. A quality smart charger with desulfation mode adds more cost if you need to purchase one. Replacement flooded and AGM deep-cycle batteries come at varying prices depending on type and quality. A LiFePO4 replacement costs more upfront but lasts significantly longer and requires no maintenance.
If you’ve run three full reconditioning cycles and the battery still won’t hold 70% of rated capacity, the math favors replacement. Check top signs your battery needs replacement for a clear decision checklist.
Routine maintenance that prevents sulfation from coming back
The best battery maintenance tip is the one that makes reconditioning unnecessary. Sulfation is almost always a result of neglect, not bad luck.
- Charge after every use. Don’t let a deep-cycle battery sit discharged. Even a partial discharge left overnight accelerates sulfation.
- Use a float or maintenance charger during storage. A smart charger in float mode keeps the battery at full charge without overcharging. This is the single most effective way to extend deep-cycle battery life.
- Equalize flooded batteries every 30–90 days. Regular equalization prevents cell imbalance from building up. Check your charger’s manual for the correct equalization voltage for your battery.
- Keep flooded cells topped with distilled water. Check levels monthly. Plates exposed to air sulfate rapidly. Follow a consistent battery watering workflow to avoid overfilling or underfilling.
- Store at 50–80% state of charge in a cool, dry location. Heat accelerates self-discharge and sulfation. A garage that stays below 80°F is far better than a hot shed.
- Avoid repeated deep discharges below 50% capacity. Deep-cycle batteries are designed for this, but repeated full discharges shorten plate life faster than anything else.
- Clean terminals every three months. Corrosion increases resistance and causes voltage drop. A wire brush and baking soda solution takes five minutes.
Pro Tip: Before putting an RV, boat, or golf cart away for winter, fully charge the battery, disconnect it from the vehicle, and connect a maintenance charger. A battery that goes into storage at full charge and stays there will be ready to use in spring. One that sits discharged all winter may not be.
Why professionals prefer pulse/desulfation over chemical fixes
The expert consensus on deep cycle battery restoration is clear: smart charger desulfation is the safer, more repeatable method, and chemical additives are a last resort that requires precision most DIYers don’t have.
The core reason professionals favor pulse/desulfation technology is control. A quality smart charger applies precisely calibrated voltage pulses and absorption phases, monitors temperature and voltage response, and stops automatically when conditions fall outside safe parameters. Epsom salt and other chemical additives offer none of that feedback. You’re working blind, and the margin for error is narrow. Incorrect dosing or application to the wrong battery type can permanently damage plates in ways that aren’t visible until the battery fails under load.
Modern smart pulse-charging technology is generally the safer, more standard industry approach compared with chemical additives that require precise handling. That’s not a knock on Epsom salt as a method. It’s a recognition that the method demands more knowledge and care than most people bring to it.
Early intervention also matters more than most guides acknowledge. Reviving a battery within weeks of failure significantly improves the chance and duration of post-revival service compared with batteries left dead for months. Sulfate crystals harden over time. A battery that’s been sitting dead since last season is a much harder problem than one that died last week.
Cell-to-cell variance is the other number worth watching. If internal cells show more than 30% capacity variance, the battery should be retired. That level of imbalance indicates plate damage that no charger or chemical can reverse.
For readers whose batteries are past the point of revival, Bansheebatteries offers AGM and LiFePO4 replacement options with industry-leading warranties (4-year for AGM, 5-year for lithium marine) and expert support for selecting the right replacement.
Key Takeaways
Successful deep cycle battery restoration depends on catching sulfation early, using smart charger desulfation as the first method, and knowing the hard failure signs that make reconditioning unsafe or pointless.
| Point | Details |
|---|---|
| Test before you attempt anything | Check resting voltage, specific gravity, and load capacity before committing to any reconditioning method. |
| Pulse/desulfation is the safest first step | Smart chargers with repair modes work on flooded, AGM, and gel batteries without opening the case. |
| Epsom salt is flooded-only and high-risk | Never use chemical additives in AGM or gel batteries; incorrect dosing permanently damages plates. |
| Hard failure signs mean recycle, not repair | 0V, swelling, cracked case, or more than 30% cell variance are stop signs, not starting points. |
| Bansheebatteries offers replacement options | When revival isn’t practical, Bansheebatteries AGM and LiFePO4 batteries carry 4- and 5-year warranties respectively. |
The case for knowing when to quit
Most articles about how to recondition batteries spend 90% of their words on the methods and about two sentences on when to stop. That’s backwards. The methods are straightforward once you understand them. The hard part is being honest about what a battery can and can’t recover from.
Here’s what gets overlooked: a revived battery is not a new battery. Even the best-case outcome, a deep-cycle marine battery that runs well for a year or more post-revival, is a temporary fix. You’re buying time, not restoring original capacity. That’s worth doing when the battery is relatively young, the failure was caught early, and the reconditioning cost is well below replacement. It’s not worth doing when the battery is four or five years old, has been sitting dead since last year, and you’ve already run two failed desulfation cycles.
The Epsom salt method deserves a specific note. It works, in the right conditions, on the right battery, with the right dosing. But the online guides that present it as a simple fix are doing readers a disservice. The margin between “helpful” and “permanently damaging” is narrow, and there’s no visual feedback to tell you which side you’re on until you run a load test. If you’re not comfortable with the precision it requires, stick to smart charger desulfation and save the chemical approach for a second attempt on a flooded battery that hasn’t responded to anything else.
The bigger picture: good battery maintenance tips make reconditioning a rare event, not a regular one. Float charging during storage, avoiding deep discharges, and keeping flooded cells topped with distilled water will do more for battery life than any revival method. Prevention is cheaper, faster, and more reliable than any fix.
When reconditioning fails: replacement options from Bansheebatteries
If your battery has failed the diagnostics or hasn’t responded after three reconditioning cycles, a replacement is the right call. Bansheebatteries builds AGM and LiFePO4 batteries specifically for the conditions that kill deep-cycle batteries fastest: marine environments, RV use, golf carts, and off-grid power systems.
The LiFePO4 marine battery lineup is worth a serious look if you’re tired of the reconditioning cycle. Lithium iron phosphate chemistry doesn’t sulfate, tolerates partial states of charge without damage, and delivers consistent capacity across thousands of cycles. The 5-year warranty on Bansheebatteries lithium marine batteries reflects that durability. For a direct replacement, the 12V 100Ah LiFePO4 deep-cycle battery covers RV, marine, and trolling motor applications. If you prefer to stay with AGM, Bansheebatteries AGM batteries carry a 4-year warranty and are built to handle the vibration and temperature swings that shorten cheaper batteries’ lives.
To get started, measure your current battery’s group size and Ah rating, then use the Bansheebatteries product finder or contact their support team to confirm the right fit. The right replacement, properly maintained, won’t need reconditioning for years.
Useful sources and recycling resources
The following sources informed this guide and are worth bookmarking for deeper reading:
- How to Recondition a Deep Cycle Battery — Charlie’s Workshop: Hydrometer procedure and specific gravity interpretation.
- Deep Cycle Marine Battery Guide — Bansheebatteries: Marine and RV application context and maintenance best practices.
For battery recycling in the U.S.:
Lead-acid batteries are among the most recycled products in the country. The U.S. Environmental Protection Agency estimates that over 99% of lead-acid battery lead is recovered and recycled. To find a drop-off location near you, check with AutoZone, O’Reilly Auto Parts, Advance Auto Parts, or Interstate Batteries — all accept used lead-acid batteries at no charge. Your county’s household hazardous waste program is another reliable option. Never dispose of a lead-acid battery in regular trash or a recycling bin.
This article provides general educational information about battery maintenance and reconditioning. It is not a substitute for professional electrical or safety advice. Always confirm current disposal regulations with your local authority or a qualified professional.