


How RV Shore Power Affects Batteries: What Owners Need to Know
Shore power can and usually does charge your RV house batteries — but only when a functioning converter or inverter/charger is in the circuit, the pedestal is delivering adequate voltage, and your battery disconnect switch is turned on. Miss any one of those three conditions and your batteries sit idle while you assume they’re charging.
Two things to know right now:
- When everything works, shore power is the most reliable “reset” source you have. It tops off your battery bank, prevents sulfation in lead-acid batteries, and keeps you ready for the next trip.
- When batteries keep dying while plugged in, the culprit is almost always a faulty converter/charger, a blown fuse or tripped breaker, or a battery disconnect that got left in the off position.
Three quick checks you can run in five minutes:
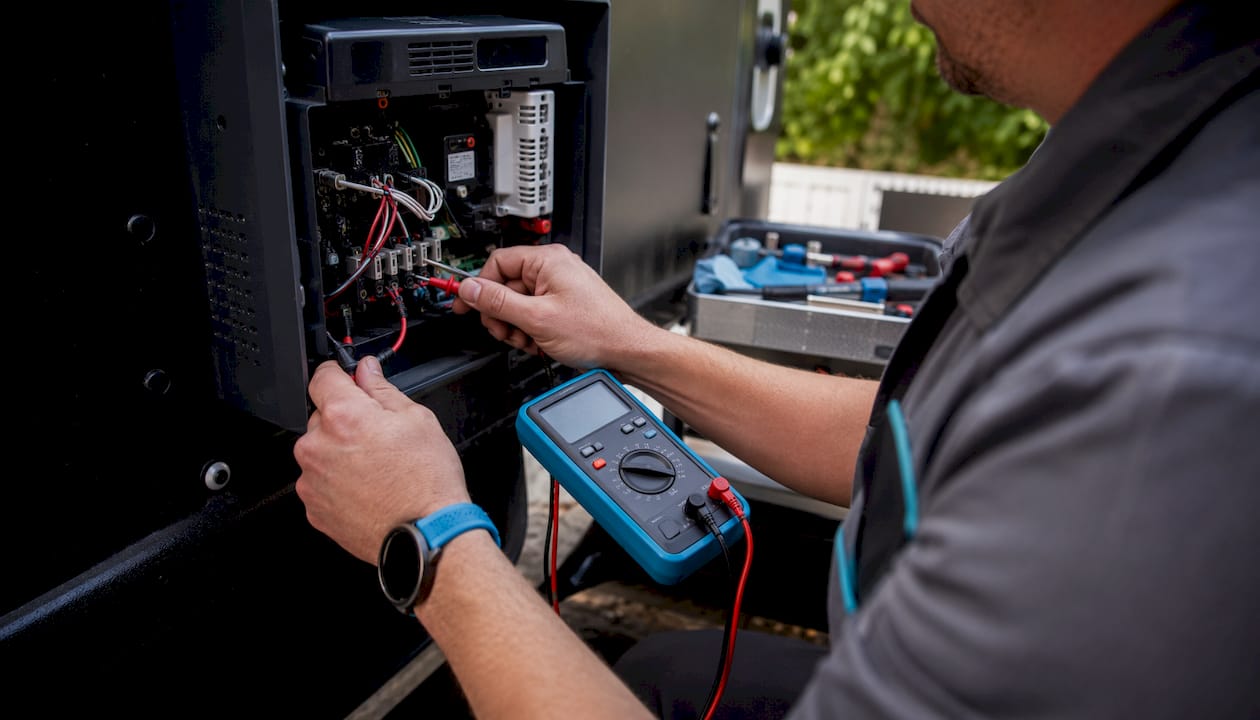
- Measure pedestal voltage with a multimeter or a surge protector that shows a voltage readout. Anything below 108V AC under load is a problem.
- Confirm your battery disconnect switch is in the ON position.
- Check your converter/charger’s status lights and inspect its fuse for continuity.
Table of Contents
- How shore power travels from the pedestal to your battery bank
- Does shore power actually charge your batteries? Stages, voltages, and charger behavior
- Why battery chemistry determines how shore power charges you
- Why RV batteries keep dying even when plugged into shore power
- How to protect battery life during shore-power sessions
- How shore power works alongside solar and your inverter system
- Step-by-step checklist: diagnosing why batteries aren’t charging on shore power
- What Bansheebatteries recommends: charger matching and warranty guidance
- Key Takeaways
- The part most RV owners get wrong about shore power
- Bansheebatteries has the batteries and chargers built for modern RV charging
- Useful sources and further reading
How shore power travels from the pedestal to your battery bank
The path from the campground pedestal to your 12V batteries runs through several components, and a failure anywhere along that chain stops charging cold.
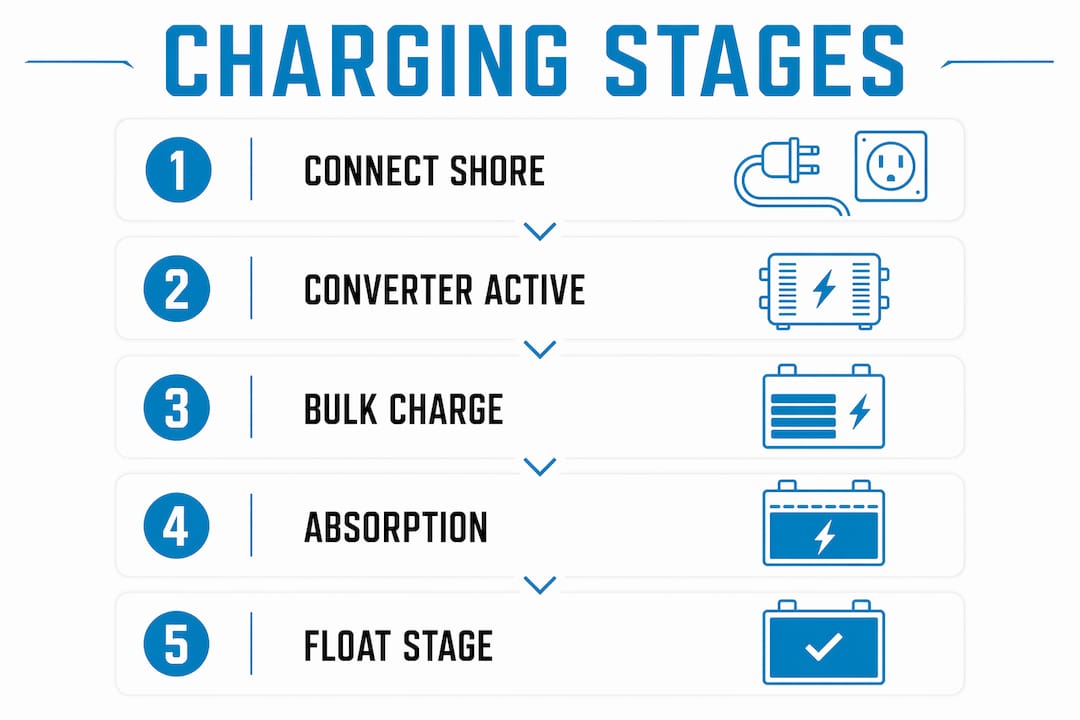
Here’s the sequence: the campground pedestal delivers 120V AC → your shore cord and inlet bring it into the RV → the main AC distribution panel routes it through breakers → a converter/charger (or inverter/charger) converts AC to DC → the 12V battery bank receives that DC current, which also feeds your DC loads.
Converter vs. inverter/charger — they’re not the same thing. A basic converter only steps AC down to DC to power 12V loads and trickle-charge batteries. An inverter/charger does all of that plus manages multi-stage charging when AC is present and inverts DC back to AC when you’re off-grid. Older RVs often have a basic converter; newer rigs and most lithium upgrades use a proper inverter/charger. If your rig lacks a built-in charger or has a failed converter, shore power will not recharge the battery bank at all.
Every component on that path is a potential failure point:
- Shore cord and inlet (physical damage, loose connection)
- Main AC breaker (tripped or faulty)
- Converter/charger fuse (blown)
- Battery fuse or inline fuse (blown)
- Battery disconnect switch (left open)
- Terminal connections (corroded or loose)
Pro Tip: Before you plug in at any campground, run your shore cord through a surge protector with a built-in voltage display. A pedestal surge protector with a voltage readout tells you immediately whether the pedestal is wired correctly and delivering safe voltage — protecting your converter from damage that would prevent charging.
Does shore power actually charge your batteries? Stages, voltages, and charger behavior
Yes — when a compatible converter or inverter/charger is present and functioning, shore power charges your batteries through a staged process that protects them from both undercharge and overcharge.
Modern smart chargers use three stages:
| Stage | What Happens | Typical Voltage (12V Lead-Acid) | Typical Voltage (12V LiFePO4) |
|---|---|---|---|
| Bulk | Maximum current delivered until battery reaches ~80% | — | — |
| Absorption | Voltage held constant; current tapers as battery fills | — | — |
| Float | Voltage reduced to maintenance level; prevents overcharge | — | 13.6V (or off) |
What each stage accomplishes:
- Bulk: Pushes the most energy in the shortest time; safe because the battery absorbs current freely at low state of charge.
- Absorption: Finishes the top 20% of capacity without gassing or heat damage; this stage takes the longest.
- Float: Holds the battery at full charge indefinitely without overcharging — critical for long shore-power sessions.
The float stage is what makes modern smart chargers safe for extended hookups. Older, non-smart converters often output a fixed voltage around 13.6V continuously, which can overcharge flooded lead-acid batteries over days or weeks. Smart converter/chargers switch to float or maintenance mode when batteries are full, which eliminates most overcharge risk in modern systems.
Charge time varies significantly depending on the charger and battery chemistry; lithium-compatible smart chargers generally complete charging faster than basic converters due to LiFePO4 batteries accepting higher charge rates.
Why battery chemistry determines how shore power charges you
Charger compatibility is the single most important factor in getting a full, safe charge from shore power. The wrong charge profile either undercharges your batteries or shortens their life.
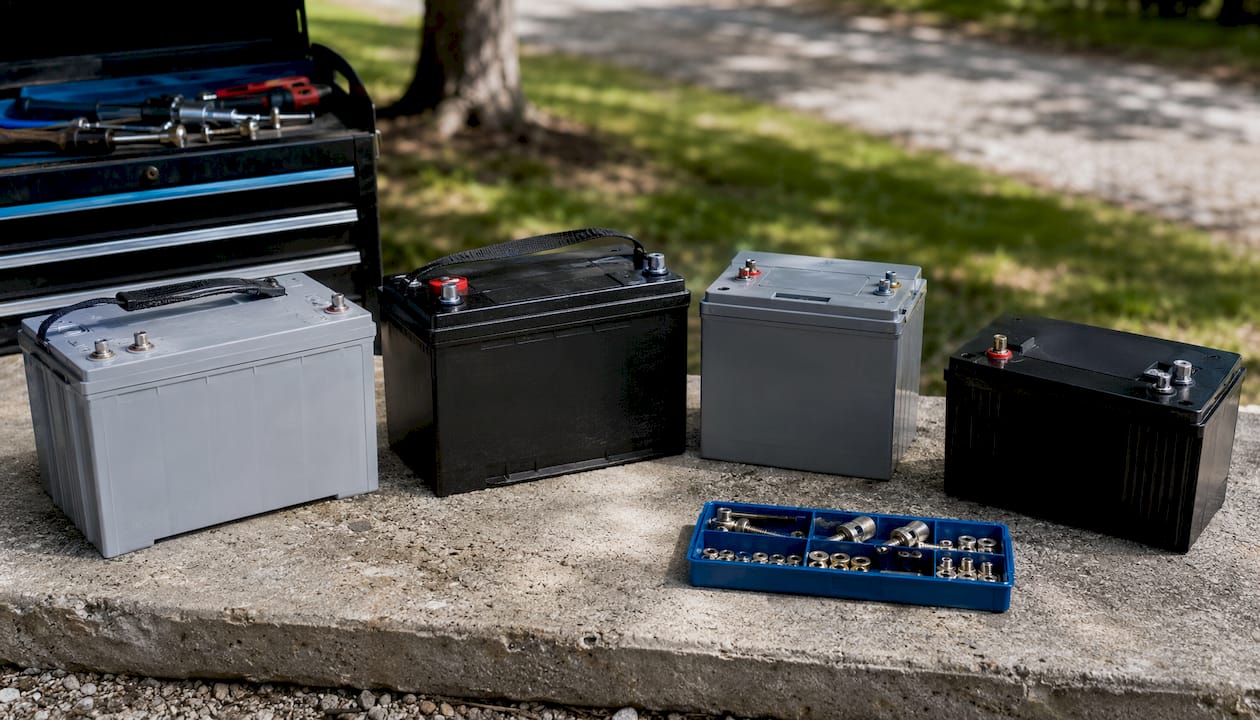
Here’s how the common chemistries compare:
| Chemistry | Overcharge Tolerance | Needs Multi-Stage Charger | LiFePO4-Compatible Charger Required |
|---|---|---|---|
| Flooded Lead-Acid | Moderate (vents gas) | Strongly recommended | No |
| AGM | Low (sealed, no venting) | Yes | No |
| Gel | Very low | Yes (Gel-specific profile) | No |
| LiFePO4 | Very low (BMS protects) | Yes | Yes |
Flooded lead-acid batteries can tolerate some overcharge because they vent gas, but chronic overcharge boils off electrolyte and plates corrode. They need a full absorption cycle to prevent sulfation.
AGM and Gel batteries are sealed, so they can’t vent excess gas. Overcharging damages them permanently. Both benefit from a smart multi-stage charger, and Gel batteries need a Gel-specific voltage profile — a standard AGM profile runs too high.
LiFePO4 is where most upgrade mistakes happen. These batteries need a lithium-compatible charge profile with specific voltage targets, and their Battery Management System (BMS) will disconnect the battery if voltage goes too high or too low. An old converter pushing the wrong voltage won’t just undercharge a LiFePO4 bank — it can trigger BMS shutdowns that look like a dead battery. LiFePO4 also has cold-charge limits: most BMS units cut off charging below 32°F to prevent lithium plating.
When switching to LiFePO4, upgrade to a lithium-compatible converter/charger or add a DC-to-DC charger so shore power uses the correct profile. For a deeper look at how AGM and lithium compare on real-world performance, Bansheebatteries has a detailed breakdown of AGM vs. lithium chemistry worth reading before you decide.
Why RV batteries keep dying even when plugged into shore power
If your batteries are draining while connected, the charging path or a parasitic load is almost always the cause — not the battery itself, at least not initially.
- Faulty converter/charger. The most common culprit. Quick test: measure DC voltage at the battery terminals with shore power connected. If voltage isn’t rising above resting voltage (12.6V for a full lead-acid battery), the converter isn’t outputting.
- Blown fuse or tripped breaker. A single blown fuse between the converter and battery stops all charging. Quick test: inspect the converter’s output fuse and the inline battery fuse for continuity with a multimeter.
- Battery disconnect switch in the off position. Obvious but frequently missed. Quick test: locate the disconnect switch (usually near the battery compartment or on the wall) and confirm it’s ON.
- Loose or corroded connections. High resistance at a terminal can drop voltage enough to prevent effective charging. Quick test: wiggle battery cables and inspect terminals for white or green corrosion.
- Parasitic draws. Propane detectors, control modules, inverters left on, and even some LED lighting can drain a battery faster than a weak converter can charge it. Quick test: use a clamp meter on the negative battery cable with everything off to measure standing current draw.
- Low pedestal voltage or miswired pedestal. Pedestals at older campgrounds sometimes deliver low voltage, especially under load. Below about 108V AC, many converters reduce output or shut down. Quick test: check pedestal voltage with a surge protector readout or multimeter.
- Incompatible charger profile. A charger set for flooded lead-acid running a LiFePO4 bank may trigger BMS shutdowns repeatedly. Quick test: confirm charger profile matches battery chemistry in the charger’s settings menu.
Pro Tip: Test the pedestal first, before you open a single panel on your RV. A surge protector with a voltage readout or a simple receptacle tester rules out the pedestal in 30 seconds and saves you an hour of unnecessary troubleshooting inside the rig.
How to protect battery life during shore-power sessions
Shore-power hookups are a maintenance opportunity, not just a convenience. The habits you build around plugging in determine how long your batteries last.
- Always use a surge protector or EMS (Energy Management System) at the pedestal. A quality EMS monitors voltage, checks polarity, and disconnects automatically if conditions fall outside safe limits. This protects your converter, which protects your batteries.
- Confirm charger compatibility before every chemistry change. If you’ve upgraded batteries since the RV was built, verify the converter/charger profile matches. For smart charger options that handle multi-stage charging correctly, Bansheebatteries covers charger features and float behavior in detail.
- Use a battery monitor. A shunt-based monitor (like a Victron BMV series or similar) shows real-time state of charge, voltage, and current. You’ll know immediately if charging has stopped or if a parasitic draw is pulling the bank down overnight.
- Inspect terminals and converter ventilation periodically. Converters generate heat. A clogged vent screen or corroded terminal quietly degrades charging efficiency over months.
- Use the battery disconnect intentionally. Turn it off when storing the RV for weeks without shore power. Leave it on when plugged in so the charger can do its job.
Shore power is also the most reliable way to start each trip with a full bank — cheaper and more thorough than relying on solar or the alternator alone.
Pro Tip: For storage lasting more than a month, verify your charger’s float voltage and whether it has temperature compensation. In freezing temperatures, a charger without temperature sensing can push too much current into a cold battery. A dedicated maintainer with a temperature sensor is a better choice for winter storage.
How shore power works alongside solar and your inverter system
Shore power, solar, and your alternator each have a distinct job in a well-designed charging system. Shore power handles full resets, solar sustains the bank day-to-day, and an alternator or DC-to-DC charger recovers charge while you’re driving. The key is making sure all three sources use compatible profiles for the same battery bank.
- Shore + solar: When plugged in, your shore-side charger handles bulk and absorption. Solar can contribute during the day but typically steps back once the battery is full. If both sources are active simultaneously without coordination, they can fight over voltage targets. Most modern solar charge controllers handle this gracefully, but verify your controller’s absorption voltage matches the shore charger’s profile.
- Shore + inverter/charger: An inverter/charger automatically prioritizes shore power when AC is present, switching to inversion only when AC drops. This is the cleanest setup for RV use because one device manages the full charging cycle.
- Multi-source caution: Never let two chargers with different voltage profiles feed the same battery bank without proper configuration. A solar controller set for flooded lead-acid and a shore charger set for lithium will conflict, and the battery’s BMS may shut down unpredictably.
For wiring guidance on multi-source setups, the Bansheebatteries RV battery bank wiring guide covers isolation, fusing, and safe multi-charger configurations.
Step-by-step checklist: diagnosing why batteries aren’t charging on shore power
Work through this sequence before calling a technician. Stop at the step that reveals the fault.
Safety first: Disconnect sensitive electronics before testing. Work with insulated tools. If you’re uncomfortable working near AC wiring or your converter’s AC input terminals, stop and consult a qualified electrician or RV technician. Never bypass fuses or jury-rig high-voltage connections.
- Verify pedestal voltage and polarity. Plug in your surge protector or EMS and read the voltage display. Confirm polarity is correct (most EMS units flag a miswired pedestal automatically).
- Inspect the shore cord and inlet. Look for burned pins, damaged insulation, or a loose connection at the RV inlet. A partially seated cord can deliver enough voltage to power lights but not enough to run the converter.
- Check AC breakers and converter/charger fuses. Reset any tripped breaker. Test the converter’s output fuse with a multimeter set to continuity.
- Measure DC battery voltage with shore power connected. A charging battery should show rising voltage above its resting level within a few minutes of plugging in. No rise means no charging current is reaching the bank.
- Inspect battery terminals and the disconnect switch. Clean any corrosion with a baking-soda solution and a wire brush. Confirm the disconnect is ON.
- Isolate parasitic loads. Pull fuses one at a time and watch the current draw on your battery monitor or clamp meter. A load that drops current significantly when its fuse is removed is your draw.
- Test converter output or call a pro. If the converter has no DC output voltage at its terminals with AC present and fuses intact, the converter has likely failed. Replacement is straightforward on most rigs, but inverter/charger upgrades involve AC wiring and are best handled by a certified RV technician or a marine electrical professional for complex systems.
What Bansheebatteries recommends: charger matching and warranty guidance
Bansheebatteries recommends matching your converter or charger to your battery chemistry before anything else. For LiFePO4 batteries, that means a lithium-compatible charging profile — not a lead-acid converter repurposed for a lithium bank. Using an incompatible charger voids most lithium battery warranties and can trigger BMS faults that shorten the battery’s life significantly.
Key recommendations from Bansheebatteries:
- AGM batteries (covered by Bansheebatteries’ 4-year warranty) work best with a smart multi-stage charger that includes a proper absorption stage and a low float voltage. Avoid chargers that hold a fixed high voltage continuously.
- LiFePO4 batteries (covered by Bansheebatteries’ 5-year lithium marine warranty) require a lithium-compatible charger with voltage targets appropriate for LiFePO4 chemistry. Confirm BMS compatibility before installation.
- Before switching chemistries, inspect your existing converter. Older units often lack lithium profiles. Upgrade the charger first, then install the new battery.
- Retain installation records. Warranty claims for both AGM and LiFePO4 batteries are supported by documentation showing correct charger use and installation.
- Consider professional installation for inverter/charger upgrades, especially when adding a lithium bank to an older RV with legacy wiring.
Pro Tip: For AGM and LiFePO4 batteries alike, register your warranty immediately after purchase and photograph your installation setup. If a charging fault damages a battery, documentation of a compatible charger and correct wiring is the fastest path to a warranty resolution.
For a side-by-side look at how AGM and LiFePO4 perform in real conditions, the Bansheebatteries guide on AGM vs. lithium marine batteries covers cycle life, charge acceptance, and application fit.
Key Takeaways
Shore power charges RV batteries reliably only when a compatible converter or inverter/charger, correct pedestal voltage, and active battery connections are all working together.
| Point | Details |
|---|---|
| Charging is conditional | Shore power requires a working converter/charger, adequate pedestal voltage, and an open battery disconnect to charge batteries. |
| Multi-stage charging protects batteries | Smart chargers cycle through bulk, absorption, and float stages to charge fully without overcharging. |
| Chemistry must match charger profile | LiFePO4 needs a lithium-compatible charger; AGM and Gel need lower float voltages than flooded lead-acid. |
| Surge protection is non-negotiable | A quality EMS or surge protector at the pedestal guards your converter and battery bank from voltage faults. |
| Bansheebatteries AGM and LiFePO4 options | Bansheebatteries offers AGM (4-year warranty) and LiFePO4 (5-year warranty) batteries built for correct multi-stage charging profiles. |
The part most RV owners get wrong about shore power
The assumption I see most often is that plugging in equals charging. It doesn’t. Shore power is a source, not a guarantee. The converter or inverter/charger is the actual charging device, and most battery problems I hear about trace back to a converter that’s ten years old, running a fixed voltage, and slowly cooking a flooded battery or confusing a LiFePO4 BMS.
The other overlooked issue is monitoring. RV owners spend real money on batteries and then have no idea what state of charge they’re sitting at. A $50 battery monitor would have caught the parasitic draw or the weak converter output weeks before the battery failed. Small investments in a quality surge protector, a shunt-based battery monitor, and a compatible smart charger prevent the vast majority of shore-power battery failures — and they protect your warranty.
Bansheebatteries has the batteries and chargers built for modern RV charging
If you’re running an older converter or considering a chemistry upgrade, the battery you choose needs to be built for the charging profile you’re running. Bansheebatteries’ 12V 100Ah LiFePO4 deep-cycle battery is designed specifically for RV, marine, and off-grid applications — with the charge acceptance and BMS protection that modern inverter/chargers are built around. For RV owners staying with AGM, Bansheebatteries’ AGM lineup handles multi-stage charging correctly and carries a 4-year warranty.
Moving to lithium? Start with the LiFePO4 battery collection and confirm your converter is lithium-compatible before you install. Bansheebatteries’ team can help you match the right battery to your charging setup — visit bansheebatteries.com to find the right fit.
Useful sources and further reading
- Does Shore Power Charge Your RV Battery? — Our Campfire Unplugged: Covers converter behavior, float mode, and common charging failures in plain language.
- RV Battery Charging: Shore, Solar, Alternator — OffGridRVHub: Explains multi-source charging strategy and how to coordinate shore, solar, and alternator.
- Do RV Batteries Charge When Plugged Into Shore Power? — Vehicle HQ: Practical overview of what happens when a converter is absent or faulty.
- How To Charge RV Batteries — Camping World: Broad overview of all charging sources and configuration basics.
- Marine Lithium vs. AGM — Bansheebatteries: Chemistry comparison with charger compatibility guidance for upgrade decisions.
- RV Battery Bank Wiring Guide — Bansheebatteries: Safe wiring, fusing, and multi-source setup for RV battery banks.
- Deep Cycle Marine Battery Guide — Bansheebatteries: Depth of discharge, cycle life, and maintenance practices for deep-cycle batteries.