


ATV Battery Maintenance Guide for Longer Battery Life
ATV battery maintenance is the ongoing practice of charging, cleaning, inspecting, and storing your battery to keep it delivering reliable power. Whether you ride a lead-acid, AGM, or lithium (LiFePO4) battery, each chemistry has specific care needs. A healthy 12V ATV battery holds a resting voltage of 12.6–12.8V. Drop below that range and you are already losing capacity. This guide covers everything from routine checks to seasonal storage, so your battery lasts as long as possible and never leaves you stranded on the trail.
What does an ATV battery maintenance guide actually cover?
Proper ATV battery care starts with understanding what you are working with. Conventional flooded lead-acid batteries last 2–3 years, AGM batteries last 3–5 years, and lithium batteries last 5–8+ years with consistent care. That gap in lifespan is not accidental. It reflects how well each battery type tolerates neglect, heat, and irregular charging.
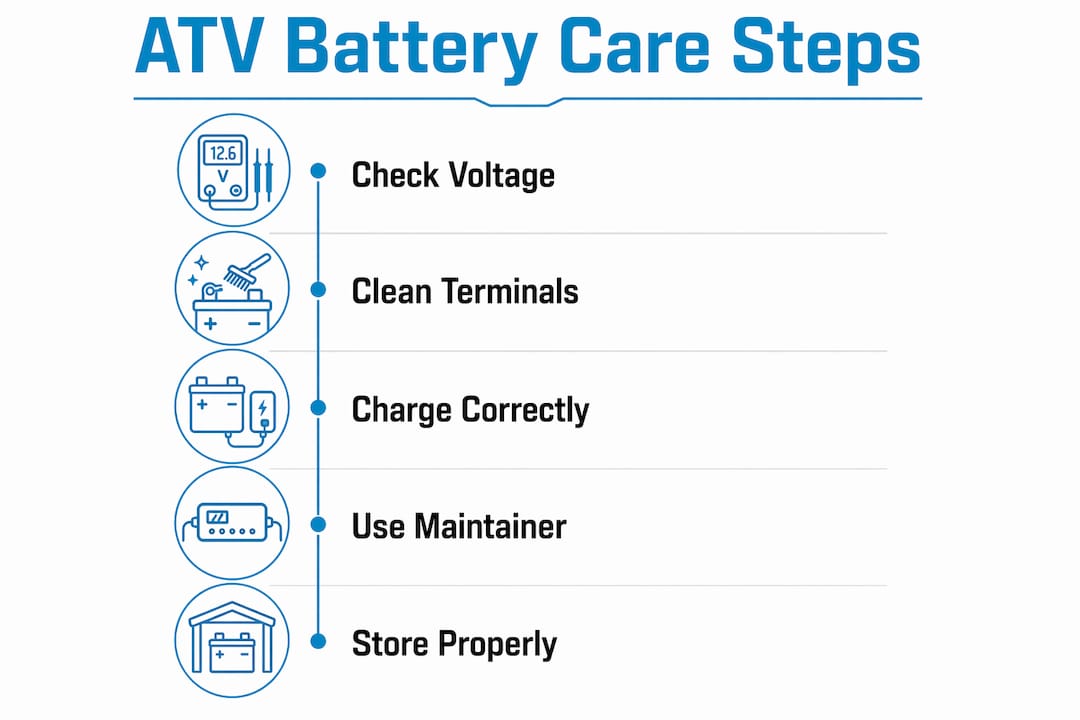
The core of any maintenance routine covers four areas: voltage monitoring, terminal cleaning, correct charging, and proper storage. Skip any one of these and you accelerate wear. Riders who treat battery care as a seasonal task rather than a year-round habit are the ones replacing batteries every two years instead of five.
Learning how to choose the correct ATV battery for your riding style is the first step. After that, the maintenance habits you build determine how long that battery actually lasts.
How do you check ATV battery health regularly?
Catching a weak battery early prevents a dead start on the trail. A multimeter is the most reliable tool for this job. Test resting voltage after the ATV has sat for at least two hours with no load.
Voltage ranges to know:
- 12.6–12.8V: Battery is fully charged and healthy.
- 12.4–12.5V: Partial discharge. Charge before your next ride.
- 12.0–12.3V: Low charge. Investigate the cause before riding.
- Below 12.0V: Battery is likely failing and may not recover.
Beyond voltage, do a visual inspection every month. Look at the terminals for white or blue powdery buildup, which signals corrosion. Check the battery case for cracks, swelling, or leakage. Any physical defect means the battery needs immediate replacement.
Signs of a weakening battery to watch for:
- Slow or sluggish cranking when starting
- Headlights noticeably dimmer than usual
- Battery fails to hold a charge after a full charge cycle
- Visible corrosion buildup on terminals
Pro Tip: Keep a simple ATV battery maintenance checklist in your garage. Note the date, resting voltage, and any visual findings each time you check. Patterns in the data tell you when a battery is trending toward failure before it actually fails.
How do you charge and maintain an ATV battery correctly?
Charging is where most riders make costly mistakes. The single biggest error is grabbing a high-amperage automotive charger from the shelf. Powersport batteries require a charging output no greater than 1/10th of the battery’s amp-hour rating. A 12Ah battery, for example, should charge at no more than 1.2 amps. Exceed that and you risk overheating the battery and shortening its life significantly.
Use a smart charger or battery maintainer designed for powersports. These chargers automatically adjust output and stop when the battery reaches full charge, preventing overcharge damage.
Step-by-step charging process:
- Turn off the ATV and let the engine cool completely before connecting any charger.
- Connect the charger’s positive (red) clamp to the positive battery terminal first.
- Connect the negative (black) clamp to the negative terminal or a grounded metal point on the frame.
- Select the correct mode on your smart charger. AGM and lithium batteries each require different charge profiles. Using the wrong profile undercharges or damages the battery.
- Allow a full charge cycle to complete. Do not interrupt mid-cycle.
- Disconnect in reverse order: negative clamp first, then positive.
After heavy riding or extended winch use, a multi-stage smart charger is the right tool to fully restore battery capacity. Basic trickle maintainers are designed for storage, not recovery after deep discharge. Using a maintainer after a hard ride leaves the battery partially charged and accelerates sulfation in lead-acid types.
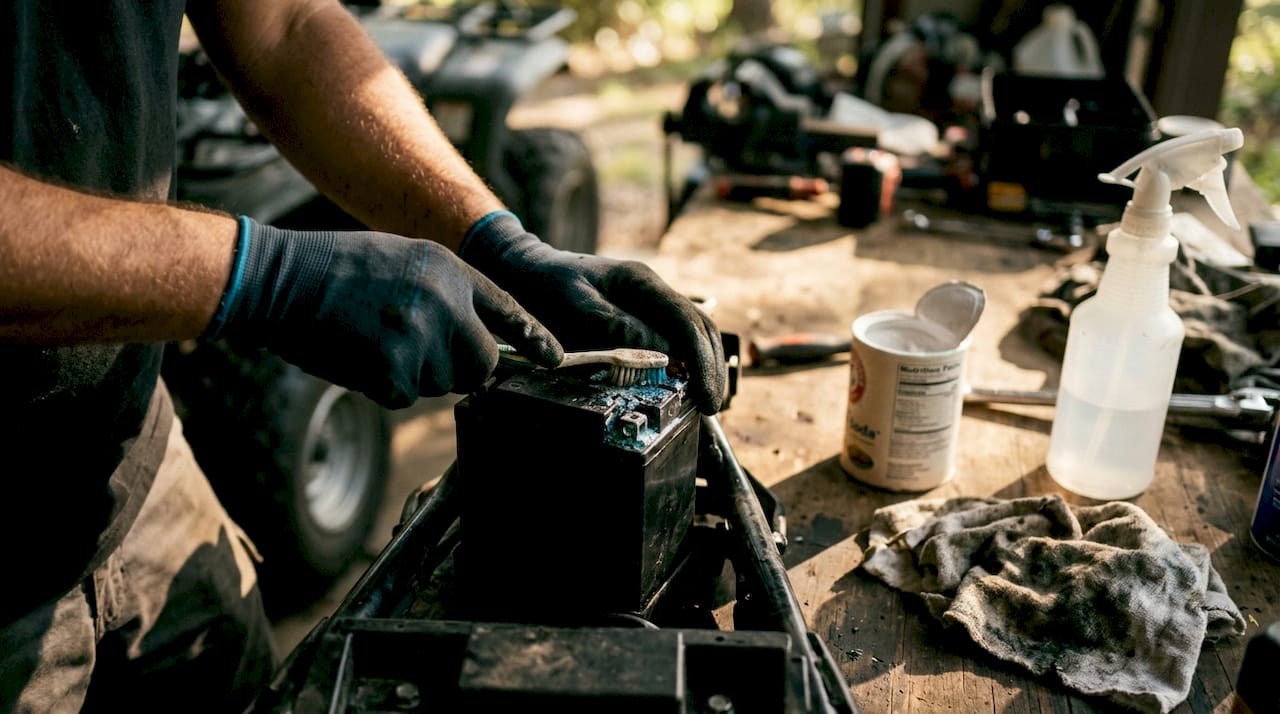
Terminal cleaning belongs in every charging session. Mix baking soda with water, apply it to corroded terminals with an old toothbrush, and rinse with clean water. Once dry, apply dielectric grease to both terminals. Dielectric grease blocks moisture and slows future corrosion without affecting electrical conductivity.
Pro Tip: If you store your ATV for more than two weeks, connect a smart maintainer to keep the battery at full charge. A battery sitting at partial charge sulfates faster and loses permanent capacity.
What are the best practices for ATV battery storage?
Storage is where batteries die quietly. Most riders disconnect the charger in the fall and reconnect it in the spring, only to find a dead battery. The problem is parasitic drain and self-discharge.
Disconnecting the negative cable fully stops parasitic electrical drain from the ATV’s electronics. Even with the ignition off, modern ATVs draw small amounts of current from clocks, sensors, and alarm systems. Over months, that drain kills a battery.
Storage best practices:
- Store the battery fully charged before putting the ATV away for the season.
- Keep the battery in a cool, dry location away from direct sunlight and freezing temperatures.
- Batteries self-discharge faster in extreme heat or cold. A garage that stays between 50°F and 70°F is ideal.
- Connect a smart maintainer every four to six weeks during storage to top off the charge.
- Inspect the battery compartment for moisture after water crossings. Standing water accelerates corrosion and can short the battery.
Temperature impact on battery life:
| Condition | Effect on Battery | Recommended Action |
|---|---|---|
| Summer heat (above 90°F) | Accelerates corrosion and fluid evaporation | Store in shade, check fluid levels (flooded type) |
| Winter cold (below 32°F) | Slows chemical reaction, reduces cranking power | Keep battery indoors or on a maintainer |
| Ideal storage (50°F–70°F) | Minimal self-discharge, stable chemistry | Connect maintainer every 4–6 weeks |
Extreme heat is the leading cause of battery damage, accelerating internal corrosion and fluid evaporation. Most riders prepare for winter storage but ignore summer heat entirely. That is a mistake. A battery baking in a hot shed all summer loses capacity just as fast as one left uncharged all winter.
If you are new to ATV ownership, the ATV buying checklist from Import Junkies covers electrical and battery considerations worth reviewing before your first season.
How do you troubleshoot common ATV battery problems?
Most battery problems follow a predictable pattern. Knowing what to look for saves you time and money before you replace a battery that might just need a proper charge cycle.
Common ATV battery problems and causes:
- Sulfation: White crystalline buildup inside the battery from sitting discharged. Reduces capacity permanently in severe cases.
- Corrosion on terminals: Blue or white powder that increases resistance and causes voltage drop. Clean with baking soda solution.
- Gradual capacity loss: Battery holds less charge over time. Normal aging, but accelerated by heat, overcharging, or deep discharges.
- Overheating during charging: Caused by using a charger with too high an output. Switch to a charger rated for powersport batteries.
- Swelling or leakage: Physical signs of internal damage. Do not attempt to charge or use the battery.
Replacement timing matters. If your battery is more than three years old (flooded type) or more than five years old (AGM), and it no longer holds a charge after a full cycle, replacement is more cost-effective than continued charging. A battery that fails to start your ATV in moderate temperatures has already lost too much capacity to recover reliably. Check the top signs your battery needs replacement before assuming a charge will fix the problem.
When removing a battery, always disconnect the negative cable first. Reconnect the negative cable last when installing. This sequence prevents sparks and electrical shorts that can damage sensitive electronics or ignite battery gases. Wear gloves and eye protection when handling flooded lead-acid batteries. The electrolyte inside is sulfuric acid and causes serious burns on contact.
Key Takeaways
Consistent ATV battery care, including regular voltage checks, correct charging, and proper seasonal storage, is the single most effective way to extend battery life and prevent trail failures.
| Point | Details |
|---|---|
| Monitor resting voltage | A healthy battery reads 12.6–12.8V; below 12.0V signals a failing battery. |
| Use the right charger | Charging output must not exceed 1/10th of the battery’s amp-hour rating. |
| Disconnect for storage | Remove the negative cable to stop parasitic drain during long-term storage. |
| Heat damages batteries | Summer heat accelerates corrosion and fluid loss as much as winter cold does. |
| Know when to replace | Flooded batteries over 3 years old and AGM over 5 years old showing poor performance need replacement. |
What I’ve learned from years of watching riders kill good batteries
The most common mistake I see is not neglect. It is misplaced confidence. Riders assume that because the ATV started fine last weekend, the battery is healthy. A battery can sit at 12.3V for months, start the machine on warm days, and then fail completely on the first cold morning of the season.
The second mistake is charger selection. Riders grab whatever charger is on the workbench. A 10-amp automotive charger on a 10Ah powersport battery is a recipe for a dead battery within a season. The math is simple: that charger is running at 100% of the amp-hour rating, not the recommended 10%. The battery overheats on every charge cycle.
Lithium (LiFePO4) batteries genuinely change the maintenance equation. They self-discharge more slowly, tolerate partial states of charge better, and last significantly longer than AGM or flooded types. The upfront cost is higher, but the five-plus-year lifespan and reduced maintenance time make the math work in your favor over a full ownership period. If you are replacing a flooded battery for the second time, that is the moment to consider upgrading.
Keep a maintenance log. Write down the date, resting voltage, and what you did. Three entries in a notebook tell you more about your battery’s trajectory than any single voltage reading ever will.
— Donald
Bansheebatteries has the right battery and charger for your ATV
Bansheebatteries has built its reputation over 20 years on powersport batteries that hold up in real conditions. Whether you need a direct replacement or an upgrade to lithium, the lineup covers both.
The lithium powersport battery collection includes LiFePO4 options designed specifically for ATVs, with faster charging and longer cycle life than conventional AGM. For riders who want proven AGM reliability, Bansheebatteries backs every AGM battery with a 4-year warranty. The smart chargers in the Bansheebatteries lineup are built for powersport amp-hour ratings, so you charge correctly every time without guessing. Visit Bansheebatteries.com to find the right battery and charger for your machine.
FAQ
What voltage should a healthy ATV battery read?
A fully charged 12V ATV battery reads 12.6–12.8V at rest. A reading below 12.0V indicates a failing battery that likely needs replacement.
How often should I charge my ATV battery during storage?
Charge the battery every four to six weeks during storage to prevent self-discharge and sulfation. A smart maintainer connected continuously is the most reliable method.
Can I use a car charger on my ATV battery?
No. High-amperage automotive chargers exceed the safe charging rate for powersport batteries. Use a charger rated at no more than 1/10th of the battery’s amp-hour capacity.
What are the signs that my ATV battery needs replacement?
Slow cranking, dim headlights, inability to hold a charge, and physical defects like swelling or leakage all indicate the battery needs replacement. Review the full replacement checklist for a complete assessment.
Is a lithium battery worth it for an ATV?
Lithium (LiFePO4) batteries last 5–8+ years with proper care, compared to 2–3 years for flooded lead-acid. The longer lifespan and lower maintenance requirements make lithium the better long-term value for frequent riders.