


6V vs 12V RV Battery: Which Setup Is Right for You?
For most RV owners, a 12V deep-cycle or 12V LiFePO4 house battery is the best starting point. It’s simpler to wire, easier to replace on the road, and every converter, inverter, and charger in your coach already speaks 12V. Two 6V deep-cycle batteries wired in series can be an option when you need maximum cycle life from flooded lead-acid chemistry or have a battery compartment that fits two smaller cases better than one large one.
The catch with 6V pairs: they create a single-point-failure risk. One weak battery in a series pair drops your entire 12V bank to zero. That’s not a theoretical problem — it’s the most common reason RVers wake up to dead house power after a night of dry camping.
Pro Tip: Before your next trip, load-test each battery in a 6V pair individually. A battery that reads 6.3V at rest but collapses under load is about to take the whole bank down with it. A $30 load tester is cheaper than a tow.
Key Takeaways
For most RV owners, a 12V deep-cycle or LiFePO4 bank is the right call; two 6V pairs earn their place only for heavy boondocking or specific compartment fits where the extra cycle life justifies the wiring complexity.
| Point | Details |
|---|---|
| Use Wh, not Ah, to compare | Wh = Ah × V; a 200Ah 6V pair and a 200Ah 12V bank deliver identical 2,400 Wh. |
| 6V pairs carry a single-point-failure risk | One failed battery in a series pair kills the entire 12V bank; parallel 12V banks lose capacity but stay live. |
| LiFePO4 wins on lifecycle cost | At 3,000–5,000 cycles and 80–90% usable DoD, lithium outlasts five or more lead-acid replacements. |
| Match chemistry to use case | Weekend hookup campers: 12V AGM. Boondockers and full-timers: 12V LiFePO4 or 6V flooded pairs. |
| Bansheebatteries covers both paths | AGM deep-cycle (4-year warranty) and LiFePO4 (5-year warranty) options match every RV use case in this guide. |
Table of Contents
- How does the 12V vs 6V RV battery comparison actually work?
- How do 6V pairs and 12V units actually perform under real use?
- What fits in your RV, and what can you realistically lift and replace?
- What does it actually cost, and can you replace it on the road?
- How does your battery choice affect chargers, solar, and the rest of your RV’s electrical system?
- What are the real failure modes, and how do you prevent them?
- Which setup is right for your RV use case?
- Why chemistry often matters more than voltage
- Side-by-side: 6V pair vs. 12V lead-acid vs. 12V LiFePO4
- Why Bansheebatteries recommends a practical approach
- Bansheebatteries has the battery your RV setup needs
- Sources
How does the 12V vs 6V RV battery comparison actually work?
The voltage number tells you how many cells are stacked inside. A standard lead-acid cell produces roughly 2V, so a 6V battery has three cells and a 12V battery has six. That’s the whole difference at the cell level.
Series vs. parallel wiring
To run a 12V RV system from 6V batteries, you wire two of them in series: connect the negative terminal of battery A to the positive terminal of battery B. The result is 12V at the same amp-hour (Ah) capacity as one of the individual batteries. Wiring two 6V units in series is the standard approach, and when you need more capacity, you add a second series pair and connect the two pairs in parallel, which doubles your Ah at 12V.
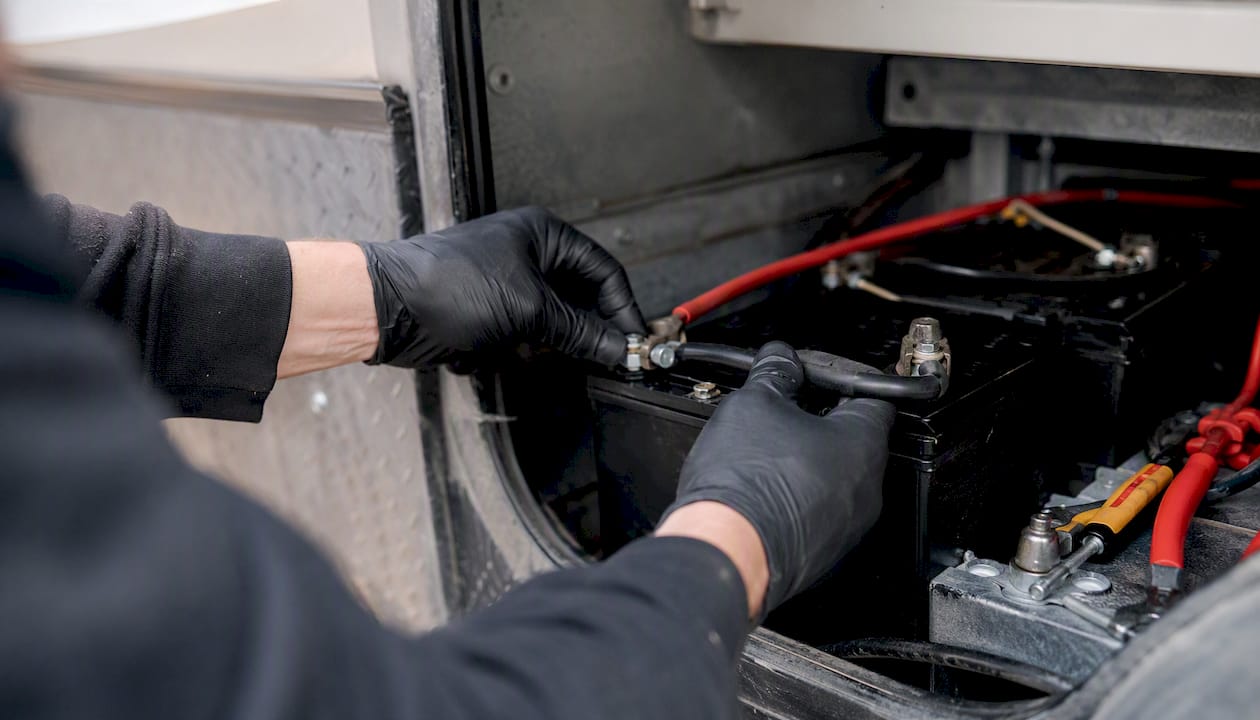
Parallel wiring connects positive to positive and negative to negative across two or more 12V batteries. Voltage stays at 12V; Ah adds up. A step-by-step series wiring guide with terminal diagrams is worth bookmarking before you start any bank build.
The Ah vs. Wh math you must use
Amp-hours alone will mislead you when comparing batteries of different voltages. Watt-hours (Wh = Ah × V) is the correct apples-to-apples metric.
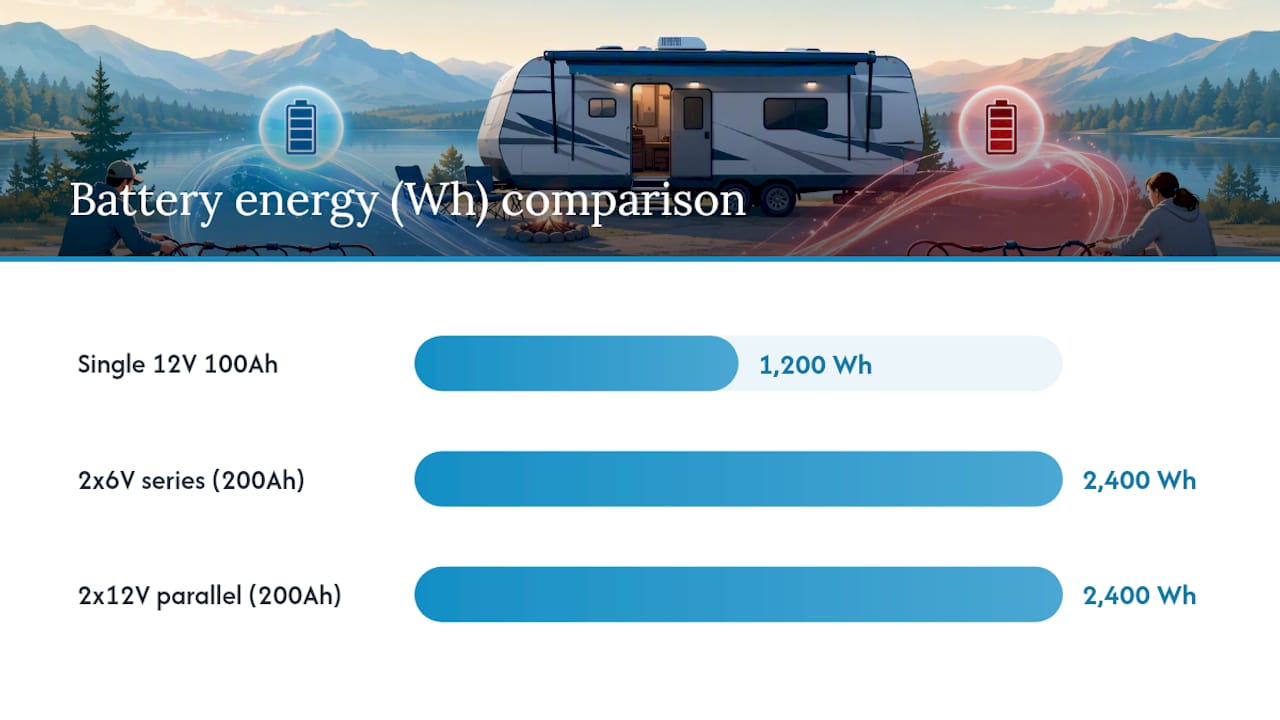
| Battery configuration | Ah rating | Voltage | Watt-hours (Wh) |
|---|---|---|---|
| Single 12V deep-cycle | 100 Ah | 12V | 1,200 Wh |
| Two 6V batteries in series | 200 Ah | 6V each (12V bank) | 2,400 Wh |
| Two 12V batteries in parallel | 200 Ah | 12V | 2,400 Wh |
A 200Ah 6V pair and a 200Ah 12V parallel bank deliver identical watt-hours. The voltage rating on the individual battery is irrelevant once you’ve done the Wh math.
Key rules to carry forward:
- Always compare Wh, not Ah, when batteries have different voltages.
- Series wiring adds voltage, not capacity.
- Parallel wiring adds capacity, not voltage.
- Use quality interconnect cables with correct gauge for your current load — undersized cables cause voltage drop and heat.
How do 6V pairs and 12V units actually perform under real use?
Usable energy and depth of discharge
Chemistry matters more than nominal voltage here. LiFePO4 batteries can safely discharge to 80–90% DoD and deliver 3,000–5,000 cycles, compared to roughly 200–500 cycles for flooded lead-acid and 400–600 for AGM under similar conditions.
Run the numbers on a common setup:
- Two 6V 225Ah flooded batteries in series: 2,700 Wh total, ~1,350 Wh usable at 50% DoD.
- Single 12V 200Ah AGM: 2,400 Wh total, ~1,200 Wh usable at 50% DoD.
- Single 12V 100Ah LiFePO4: 1,200 Wh total, ~1,000 Wh usable at 85% DoD.
The 6V flooded pair wins on raw usable energy per dollar at the entry level. The LiFePO4 wins on energy delivered per pound and per cycle over the battery’s life.
Cycle life callout: LiFePO4 at 3,000–5,000 cycles vs. flooded lead-acid at 200–500 cycles means a lithium bank can outlast five or more lead-acid replacements. At equivalent usable Wh, the lifecycle cost gap closes fast.
Plate thickness and cycle life in lead-acid
6V deep-cycle batteries often use thicker internal plates than many 12V units sold through general auto channels. Thicker plates handle repeated deep discharges better and extend service life. The trap: many 12V batteries at auto-parts stores are dual-purpose (starting + auxiliary), not true deep-cycle. Comparing a golf-cart 6V deep-cycle to a dual-purpose 12V gives misleading lifespan results. Compare deep-cycle to deep-cycle only.
Charging speed and solar compatibility
Modern MPPT solar controllers and multi-stage shore chargers handle both configurations without issue, provided you set the correct battery type profile (flooded, AGM, or lithium). For solar camp setups, the bank voltage is 12V regardless of whether you built it from 6V pairs or 12V units, so the controller sees the same system. What changes is the total Ah and Wh, which determines how long the solar array takes to recharge the bank.
What fits in your RV, and what can you realistically lift and replace?
Physical constraints often decide the question before any spec sheet does.
A typical 6V golf-cart deep-cycle battery (T-105 style) weighs roughly 62–67 lbs and measures about 10.3" × 7.1" × 11.2". Two of them in a series pair weigh 124–134 lbs combined. A comparable 12V AGM deep-cycle (Group 31) runs 60–75 lbs and measures about 13" × 6.8" × 9.4". A 12V 100Ah LiFePO4 typically weighs 26–31 lbs, roughly half the AGM equivalent.
Fit checklist before you buy:
- Measure your battery compartment’s interior dimensions (length, width, height) with a tape measure, not by eye.
- Check terminal access: can you reach both terminals with the batteries seated and the lid closed?
- Confirm ventilation: flooded batteries off-gas hydrogen during charging and need a vented compartment.
- Verify the tray or box can handle the combined weight of your chosen bank.
- Check whether the compartment door or lid can close fully with the new battery height.
Pro Tip: Two 6V batteries side by side often fit a wide, shallow compartment better than one tall Group 31 unit. But measure first — a 0.5" height difference has stranded more than one RVer at the parts counter.
The total bank weight for a 6V pair is similar to a single large 12V AGM, so payload savings are minimal unless you switch to LiFePO4. Moving individual 6V units is easier than wrestling a 75-lb Group 31 AGM into a tight compartment, which matters when you’re replacing batteries alone at a campsite.
Flooded batteries require a vented battery box with an exhaust path to the outside. AGM and LiFePO4 are sealed and can be mounted in any orientation (check the manufacturer’s spec), which opens up more placement options inside the RV.
What does it actually cost, and can you replace it on the road?
Upfront price ranges
Typical price ranges: Two 6V flooded batteries cost somewhat more than a single comparably sized 12V AGM. A 12V 100Ah LiFePO4 battery is higher priced than lead-acid options, depending on brand and BMS quality.
Two 6V flooded batteries often cost more than a single comparably sized 12V unit when you compare equivalent watt-hours. LiFePO4 carries the highest upfront cost but the lowest lifecycle cost because of its cycle count advantage.
Total cost of ownership example
A flooded 6V pair delivering 1,350 usable Wh at $200 and lasting 400 cycles costs roughly $0.37 per usable kWh cycle. A 12V 100Ah LiFePO4 delivering 1,000 usable Wh at $450 and lasting 3,000 cycles costs roughly $0.15 per usable kWh cycle. Over five years of regular use, the lithium bank typically pays for itself in avoided replacements.
Road availability
12V batteries are stocked at Walmart, AutoZone, O’Reilly, and most truck stops across the United States. 6V deep-cycle golf-cart batteries are common at Costco, Sam’s Club, and farm supply stores but are harder to find in rural areas or smaller towns. If your 6V series pair fails 200 miles from the nearest Costco, your options narrow fast.
Planning tips for emergency replacement:
- Carry the exact group size and Ah rating written in your phone, not just the battery brand.
- Know whether your system requires matched pairs (6V series) or accepts a single drop-in (12V).
- For 6V setups, identify the nearest Costco or Tractor Supply along your planned route before departure.
- LiFePO4 replacements are increasingly available online with two-day shipping, but that doesn’t help at a remote campsite.
- Keep a battery maintenance checklist and check specific gravity or state-of-charge monthly to catch a failing battery before it strands you.
How does your battery choice affect chargers, solar, and the rest of your RV’s electrical system?
12V is the default for most RV coach systems because converters, inverters, lighting, and appliances are all designed around it. Whether you build your 12V bank from 6V pairs or 12V units, the coach sees the same 12V. The complexity difference shows up in wiring, charger settings, and BMS requirements.
What to check on your existing system
- Converter/charger: Most factory-installed converters are set for flooded lead-acid. Switching to AGM or LiFePO4 requires reprogramming or replacing the converter to avoid overcharging.
- Solar MPPT controller: Set the battery type profile correctly. LiFePO4 requires a different absorption and float voltage than AGM. Running a lithium bank on a flooded profile will shorten its life.
- Inverter sizing: Current (amps) = power (watts) ÷ voltage (volts). A 2,000W inverter on a 12V bank draws up to 167A. Cable gauge must match that current — undersized cables overheat and create fire risk.
- Alternator charging: Standard alternators charge at a profile suited to starting batteries. A DC-to-DC charger (also called a battery-to-battery charger) isolates the house bank and delivers the correct multi-stage profile for AGM or LiFePO4.
- BMS for LiFePO4: A battery management system is non-negotiable for lithium. It protects against overcharge, over-discharge, and short circuits. Confirm your charger is BMS-compatible before connecting.
Pro Tip: Shore power chargers and solar controllers often have a “lithium” mode buried in the settings menu. Activating it before you connect a new LiFePO4 bank takes two minutes and can add years to the battery’s life. Check the shore power charging guide for your specific converter model.
Compatibility checklist:
- Confirm converter output voltage matches battery chemistry (14.4–14.6V for AGM, 14.2–14.6V for LiFePO4 depending on BMS spec).
- Never mix a 6V battery and a 12V battery in the same series string — the voltages will not balance and the weaker unit will be destroyed.
- Place a correctly rated fuse or circuit breaker as close to the positive battery terminal as possible.
- For multi-pair 6V banks, use a proper series/parallel wiring layout with cross-corner connections to equalize load.
- Verify MPPT controller current limits against your total panel wattage and bank voltage.
What are the real failure modes, and how do you prevent them?
Series 6V pairs vs. 12V banks
The single-point-failure risk in a series 6V pair is real and underappreciated. A failed battery in a series string drops the entire bank voltage to near zero. With a parallel 12V bank, one failed unit reduces capacity but the remaining batteries continue to power the coach. That’s a meaningful difference at 2 AM in a campground with no hookups.
Experts consistently flag matched replacements and synchronous maintenance as the non-negotiable requirements for 6V series setups. Replace both batteries in a pair at the same time, even if only one has failed. Installing a new battery alongside an old one forces the new unit to compensate for the weak one, shortening both their lives.
Maintenance by chemistry
Flooded lead-acid:
- Check electrolyte levels every 4–6 weeks during active use; top off with distilled water only.
- Check specific gravity with a hydrometer to catch a weak cell before it fails.
- Clean terminals and cable ends with a baking soda solution to prevent corrosion.
- Equalize charge every 1–3 months (a controlled overcharge that balances cells) — check your charger’s equalization mode.
AGM:
- No watering required; sealed construction.
- Avoid overcharging — AGM is more sensitive to high voltage than flooded.
- Keep terminals clean and connections tight.
- Follow the AGM maintenance guide for your specific battery’s voltage thresholds.
LiFePO4:
- Monitor BMS status indicators; most modern units have a Bluetooth app or LED display.
- Do not charge below 32°F (0°C) unless the battery has integrated heating — charging a cold lithium cell causes permanent damage.
- No equalization needed; the BMS handles cell balancing automatically.
Pro Tip: For a multi-pair 6V bank (four batteries, two series pairs in parallel), move the main positive cable to the first battery of one pair and the main negative cable to the last battery of the other pair. This cross-corner connection, recommended by RV technicians, equalizes the charge and discharge path across all four batteries and extends overall bank life.
Safety reminders:
- Wear eye protection and gloves when working near flooded batteries — sulfuric acid splashes.
- Never work near open flame or sparks; hydrogen gas accumulates during charging.
- Torque terminal bolts to spec (typically 8–10 ft-lbs for standard battery terminals) — loose connections arc and corrode.
- Disconnect the negative terminal first when removing, reconnect it last when installing.
Which setup is right for your RV use case?
| Use case | Recommended bank | Why |
|---|---|---|
| Weekend hookup camping | Single 12V AGM deep-cycle | Simple, cheap, easy to replace anywhere |
| Extended dry camping (3–7 days) | Two 6V flooded deep-cycle pairs OR two 12V AGM in parallel | Higher usable Wh; 6V pairs offer better cycle life for flooded chemistry |
| Full-time RV living | 12V LiFePO4 (100–200Ah) | Best lifecycle cost, lowest weight, highest usable DoD, no maintenance |
| Solar-heavy boondocking | 12V LiFePO4 or two 6V flooded pairs | LiFePO4 for weight and cycles; 6V flooded for lowest upfront cost with solar |
If you primarily camp at hookups, 12V setups are often the best value. If you boondock frequently and want repeated deep discharges, 6V golf-cart pairs or LiFePO4 banks are worth the tradeoffs.
Quick checks before you decide:
- Measure your battery compartment (length × width × height) before ordering anything.
- Confirm your converter/charger supports the chemistry you’re choosing.
- Check your planned solar array size against your bank’s Wh capacity.
- Assess your payload budget — LiFePO4 saves 30–50 lbs over an equivalent lead-acid bank.
- Identify the nearest replacement source for your chosen battery type along your typical routes.
Implementation checklist for your chosen setup:
- Select battery chemistry and configuration (single 12V, parallel 12V pair, series 6V pair, or LiFePO4).
- Size cables to the maximum expected current (use a wire gauge chart for your run length and amperage).
- Set charger/converter profile to match chemistry.
- Install a fuse or breaker within 18 inches of the positive battery terminal.
- For 6V banks, use cross-corner wiring on multi-pair setups.
- For LiFePO4, confirm BMS is active and charger is lithium-compatible before first charge.
- Log installation date and Ah rating for future maintenance reference.
Why chemistry often matters more than voltage
The voltage debate — 6V vs. 12V — is really a chemistry debate in disguise. A 6V golf-cart battery and a 12V AGM are both lead-acid. The real performance gap opens up when you compare lead-acid (either voltage) to LiFePO4.
LiFePO4 advantages:
- 3,000–5,000 cycles at 80–90% DoD, vs. 200–500 for flooded lead-acid.
- 30–50% lighter than equivalent lead-acid capacity.
- No off-gassing; can be mounted in enclosed spaces.
- No watering, no equalization, no specific gravity checks.
- Flat discharge curve — voltage stays near 12.8V through most of the discharge, so 12V appliances run at full efficiency longer.
Lead-acid realities (flooded and AGM):
- Flooded batteries require regular watering and ventilation.
- AGM is maintenance-free but more sensitive to overcharging.
- Both chemistries lose capacity faster below 50°F and should not be stored fully discharged.
- Typical usable DoD of 50% means you’re buying twice the Ah you can actually use.
Pro Tip: Cold-weather charging is the most overlooked LiFePO4 failure point. Most LiFePO4 batteries will not accept a charge below 32°F (0°C) without integrated heating. If you camp in cold climates, confirm your battery has a built-in low-temperature cutoff and heating element, or insulate the battery compartment. Charging a cold lithium cell causes lithium plating, which permanently reduces capacity.
Warranty and BMS quality should drive your purchase decision as much as price. A LiFePO4 battery with a weak BMS or a short warranty is a liability, not an upgrade. Look for batteries that specify BMS protection against overcharge, over-discharge, short circuit, and over-temperature, and back it with a warranty of at least three years.
Side-by-side: 6V pair vs. 12V lead-acid vs. 12V LiFePO4
Single-point-failure note: In a series 6V pair, one failed battery kills the entire bank. A 12V AGM or LiFePO4 in a parallel bank loses capacity when one unit fails but does not go dark.
Why Bansheebatteries recommends a practical approach
At Bansheebatteries, we’ve spent over 20 years building batteries for conditions that punish anything less than purpose-built. For most RV house banks, we favor 12V LiFePO4 for full-timers and serious boondockers, and 12V AGM deep-cycle for weekend and hookup campers. The reasoning is straightforward: LiFePO4’s cycle count and usable DoD make it the better long-term investment for anyone putting real miles and nights on their rig. AGM covers the majority of use cases without the upfront cost or BMS complexity.
For RVers who want the proven durability of 6V deep-cycle chemistry, our B-GC2 6V deep-cycle battery is built for exactly that application. Our 4-year AGM warranty and 5-year lithium warranty reflect what we actually expect from these batteries in the field.
Before you order, measure your battery box, confirm your charger profile, and check your payload budget. Those three steps eliminate most of the costly mistakes we see.
Bansheebatteries has the battery your RV setup needs
Choosing the right bank is half the work. Getting a battery that’s actually built for deep-cycle RV use is the other half.
Bansheebatteries offers 12V LiFePO4 batteries purpose-built for RV house banks, with BMS protection, a 5-year warranty, and specs that match the full-timer and boondocker use cases covered in this guide. For hookup campers and budget-conscious builds, the AGM deep-cycle lineup delivers reliable performance with a 4-year warranty and zero maintenance complexity. The RV battery charging guide walks through charger profiles, solar pairing, and DC-to-DC setup for every configuration discussed here.
Measure your compartment, pick your chemistry, and browse the Bansheebatteries storefront to find the exact match for your rig.
Sources
The sources below back the technical claims in this guide and are worth bookmarking for wiring diagrams, chemistry deep dives, and solar sizing math.
- Ask A Tech: 6-Volt Batteries vs. 12-Volt Batteries
- 6-Volt vs 12-Volt RV Batteries
- 12V Electrical System Basics for Campers and Van Life | VoltPlan
- Wiring Your Battery Bank In Series - Batteries In A Flash
- 12V LiFePO4 RV Battery Guide: Benefits & Setup | Anern